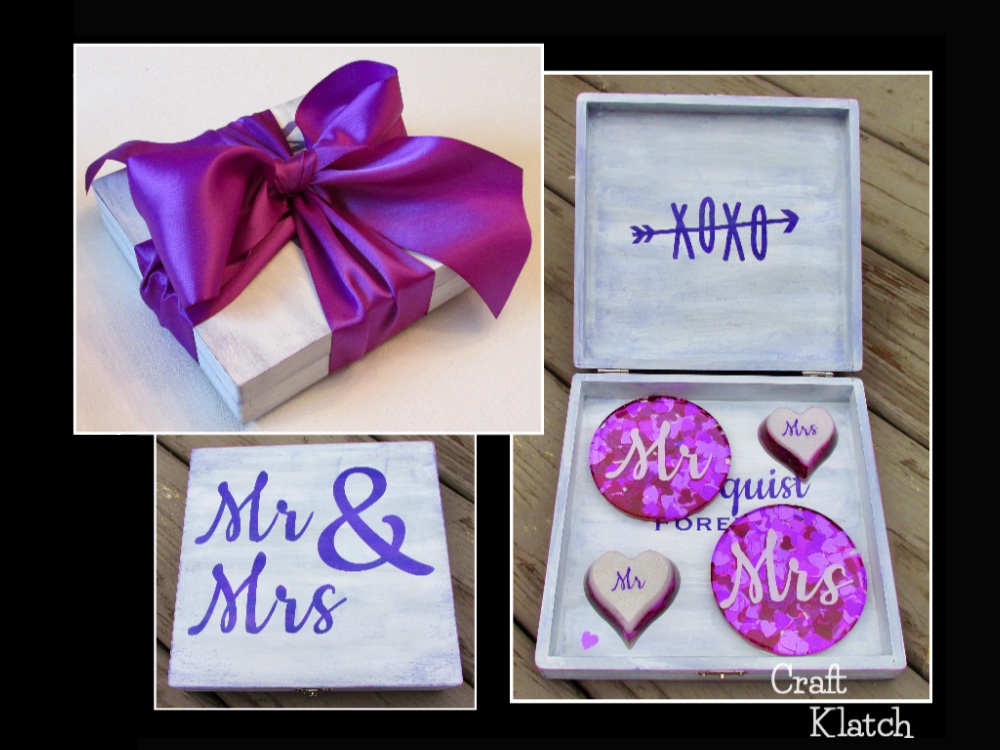
Looking for a personal and unique wedding gift? I’ll show you how to make a Mr and Mrs wedding box in this DIY craft tutorial!

I made this as part of a wedding gift for my nephew and his bride. It was made with their wedding colors – purple and washed out gray. Those colors were fitting for their beach wedding and it reminded me of driftwood.
This all came about when my purse was filled confetti. You can read that story on the wedding coasters post and the wedding paperweights post!
After making the coasters, I needed something to put the coasters in and I thought a personalized box would be nice. They could use it for anything the wanted to…after the wedding. It cold be used as a jewelry box, or a catch all home decor item – like for their keys and such.
You will need:
Wood box: https://amzn.to/2FJvOHb
Acrylic paint (be sure to use 3wedding colors): https://amzn.to/2pmcWDa
Matte varnish: https://amzn.to/2IA1P24
Sanding block: https://amzn.to/2FH6Ic1
Cricut (Amazon): https://amzn.to/2wChE2l
Cricut (Cricut site): https://www.shareasale.com/r.cfm?B=993649&U=1248544&M=51766&urllink=
Cricut vinyls: https://amzn.to/2w4DOJj

Directions:
1. I bought an unfinished box that was big enough to include the coasters and paperweights I wanted to put in it.

2. I removed the hinges.

3. The wedding color was purple, so I selected a combination of three purples. They are all acrylic paint and one was metallic.

4. I put all three colors on my brush and painted the box. I don’t mix the colors together. I like the look of different colors blended together.

5. While the paint was drying, I used my Cricut to cut Mr and Mrs out of vinyl. I also did smaller cutouts for the inside.

6. I put the vinyl onto the transfer tape and centered it on the box.

7. I burnished it down, to make sure the vinyl was stuck to the box.

8. I removed the transfer tape.

9. I then used the same combo of purples and painted over the vinyl lettering. I made sure I went in all directions. I do this so if any paint should seep under the vinyl, it will be the purple, not the next color. If it does seep under, you will never know! Do this wherever you want lettering.

10. I used a combination of gray and white acrylic paint and painted over the whole box.

11. Once dry, I pulled off the vinyl.

The lettering came out crisp and perfect!

12. I used a sanding block to sand some of the corners and give it a worn look.

Remember to give special attention to edges and corners, where you would normally see more wear and tear.

13. I wiped off the dust and then finish off with a clear, matte varnish. I suggest a minimum of two coats.

14. I reattached the hinges.

15. I added a single piece of purple confetti, since the confetti is what started this whole thing!

You can see the additional lettering I did on the inside. It’s a great opportunity to personalize it!
 |
I added the coasters and the paperweights and it all coordinated.


That’s it! You could use this technique to make a larger box for the cards or other wedding decor or home decor items!
Thanks for stopping by! Remember: Life’s too short not to shimmer, so grab your glue gun and your glitter!™ Stay safe!
Mona

I love it. Your nephew and his wife can keep love notes or other mementos in it over the years.
The above article is nice and interesting, thank you willing to share! Greetings success of admin Percetakan Murah Rawamangun Jakarta Timur wish you deign to visit my website, thank you 🙂
This comment has been removed by the author.
Cool ideas nevertheless! Wedding favors and souvenirs are a must part. They can be managed or ordered according to the budget. Baby shower party of my sister was arranged at one of the lovely Seattle Wedding venues few weeks back. Everything went smoothly and there was no confusion due to online bookings done.