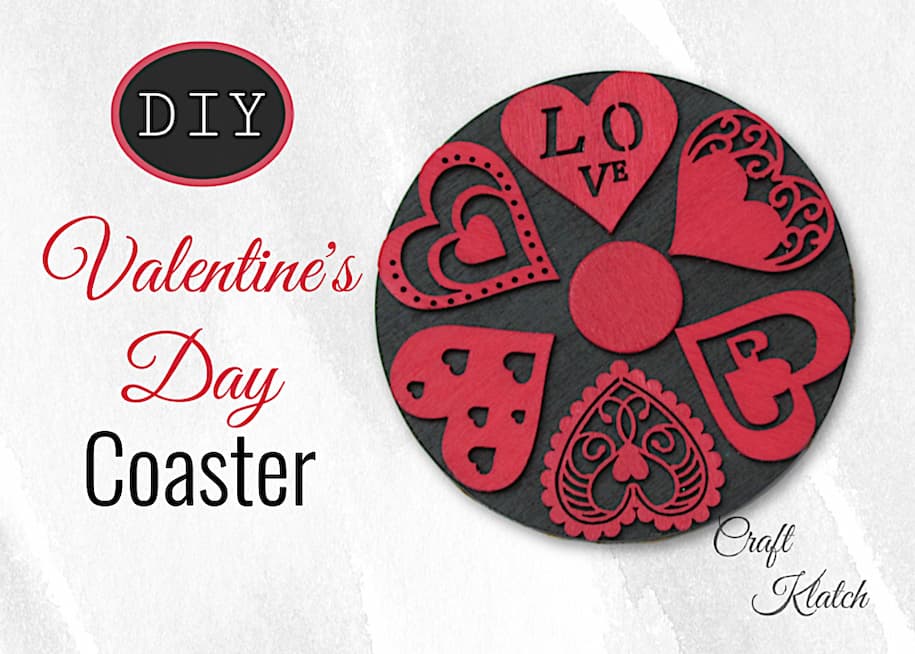
Make a DIY Valentine’s Day coaster with this simple tutorial! Perfect as home decor or a gift, this fun craft is easy for all ages to create.
Even if your heart has been broken a time or two, let’s keep believing in love! This DIY Valentine’s Day craft project is perfect for creating a cute and functional coaster.
Not only is it simple to make, but it’s so fun and a striking way to add a touch of love to your home decor. And remember- heart crafts are always in style, no matter the season!
Even though this is made as a coaster, think room decor! It would make a striking grouping as wall decor. It’s a great activity for kids and teens to work on with you!
DIY Valentine’s Day Coaster Tutorial
Check out the video tutorial below to see how to create your own DIY Valentine’s Day coaster step by step.
Materials Needed for This Project
*Disclosure: This blog uses affiliate links from Amazon and other retailers. I earn a small amount from qualifying purchases at no additional cost to you.
DIY Valentine’s Day Coaster Directions: 5 Simple Steps
Step 1: Paint the Wood Round and Hearts
Start by painting the wood round black and the laser-cut hearts red. Use multi-surface paint for durability, and be sure to paint the edges for a polished look.
I scoured my craft room to come up with this project. I knew I had hearts leftover from last years project and wanted to use some of them up.
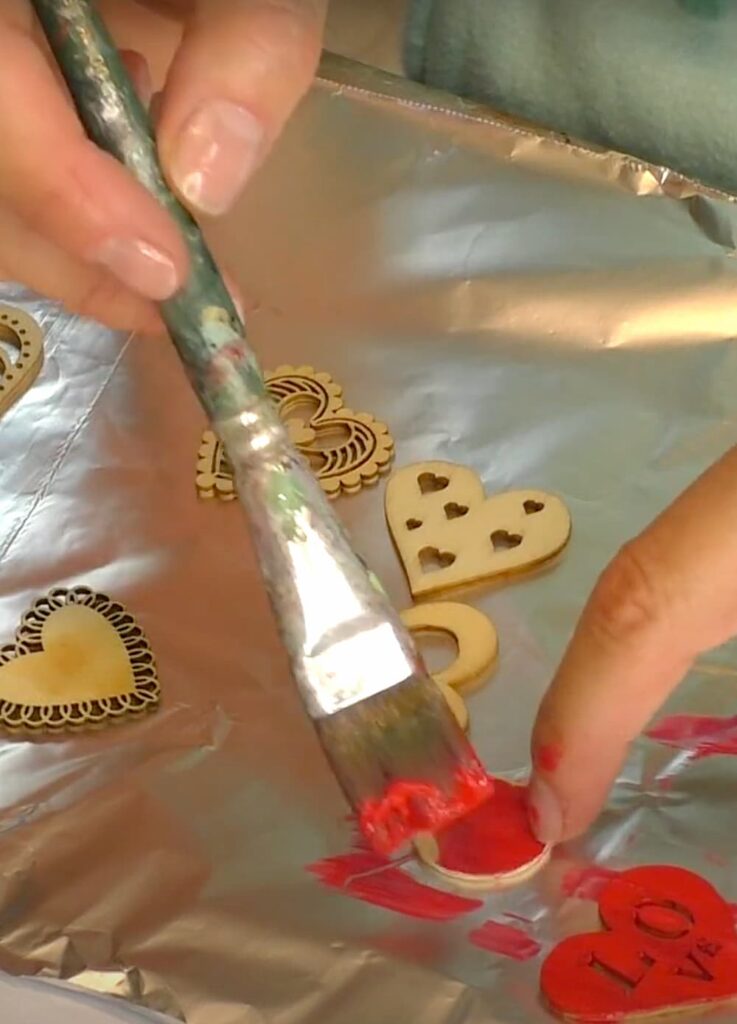
Let everything dry completely, applying a second coat if necessary.
Step 2: Plan the Heart Design
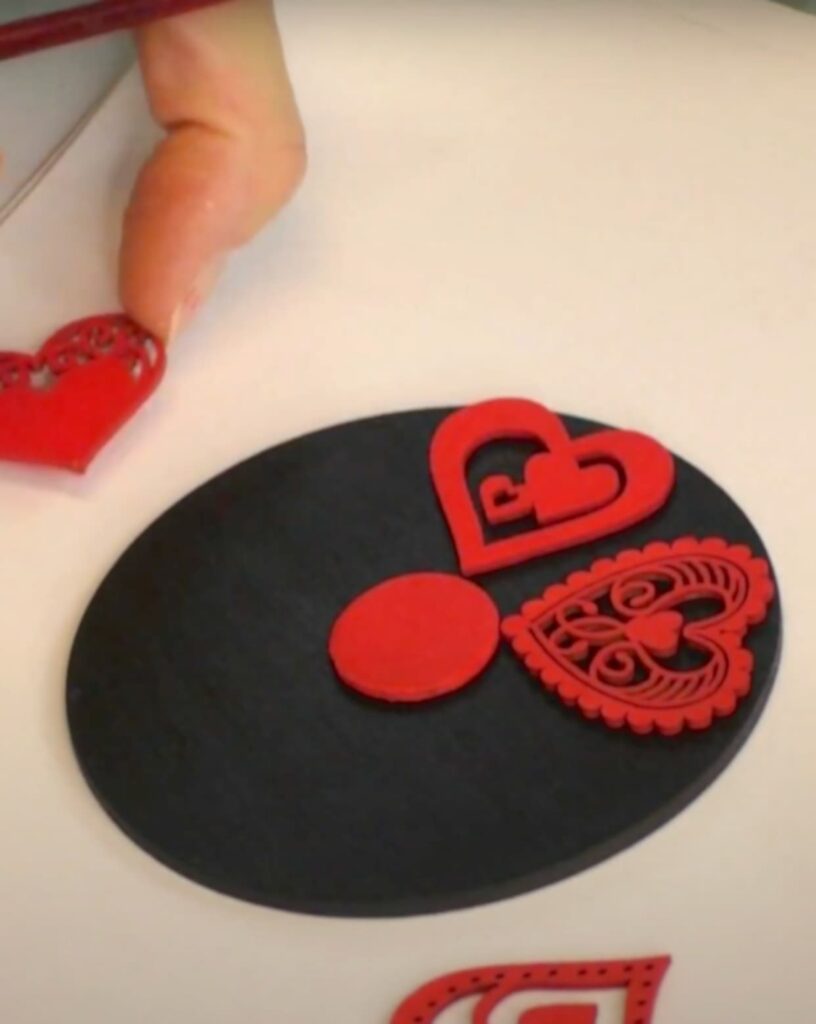
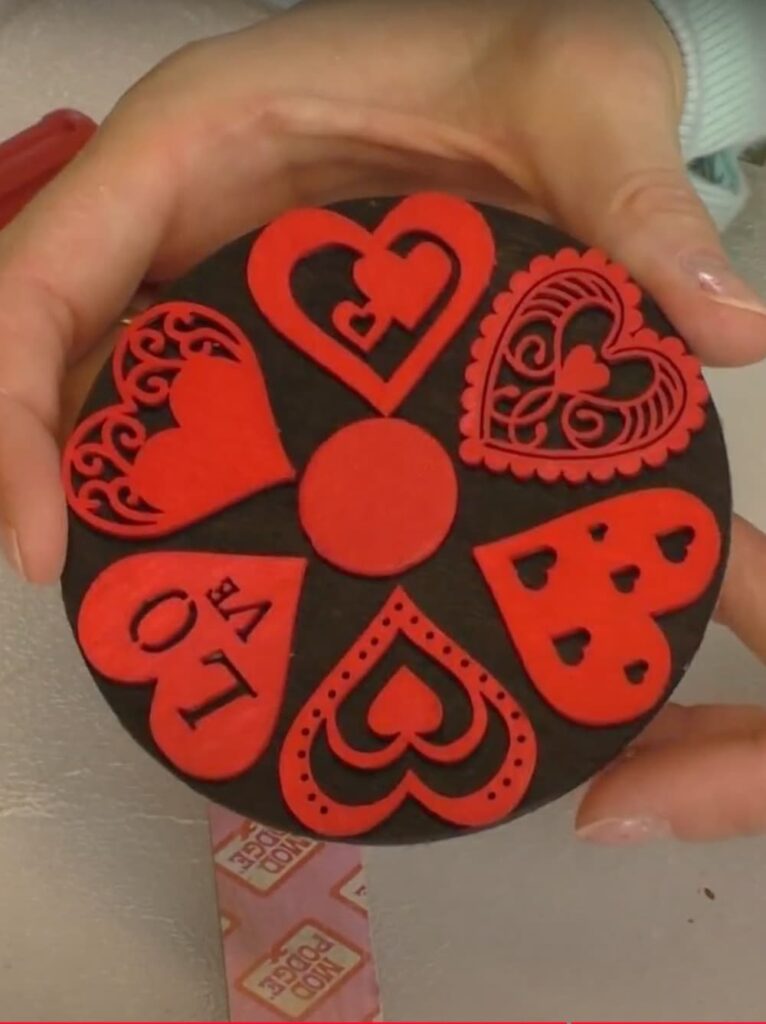
Arrange the red hearts on the black-painted wood round to find the perfect layout. Experiment with placements until you are happy with the design.
Step 3: Attach the Hearts
Now this DIY Valentine’s Day coaster is starting to take shape!
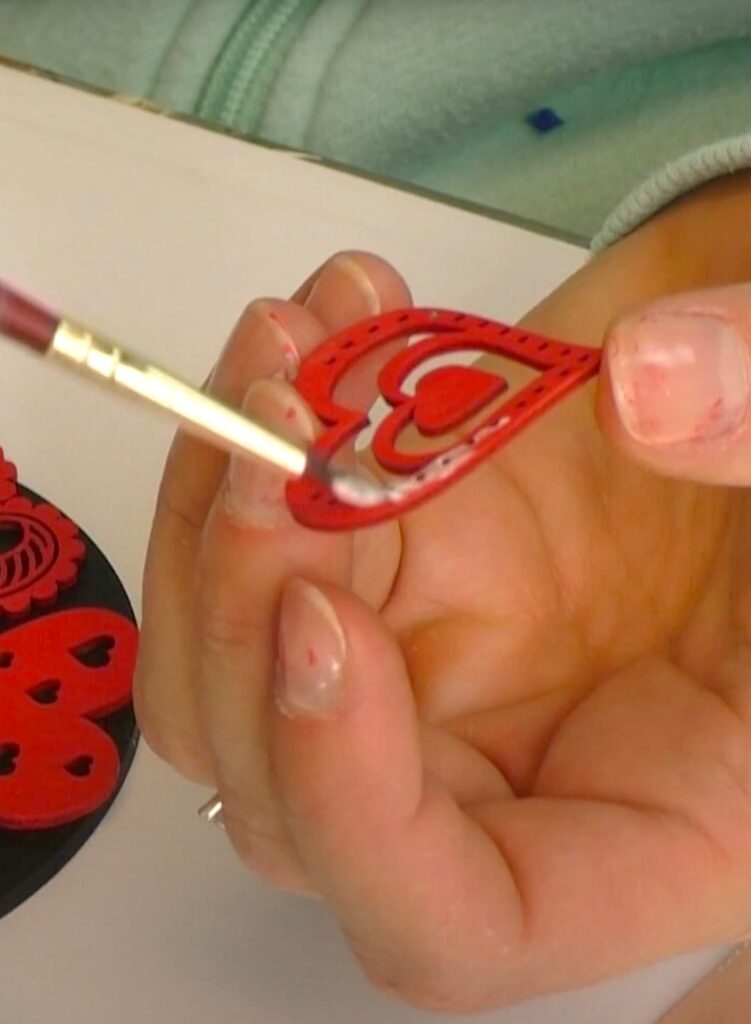
Use glue to secure each heart to the wood round. Apply a thin, even layer of glue to the back of each heart. Press firmly to ensure they stick and let them dry completely.
Step 4: Add the Cork Backing

Cut a piece of cork slightly larger than the wood round. To ensure long-lasting durability, reinforce the cork’s adhesive backing with a bead of glue along the edges
Remove the adhesive backing, position the wood round on the sticky side, and press down firmly.
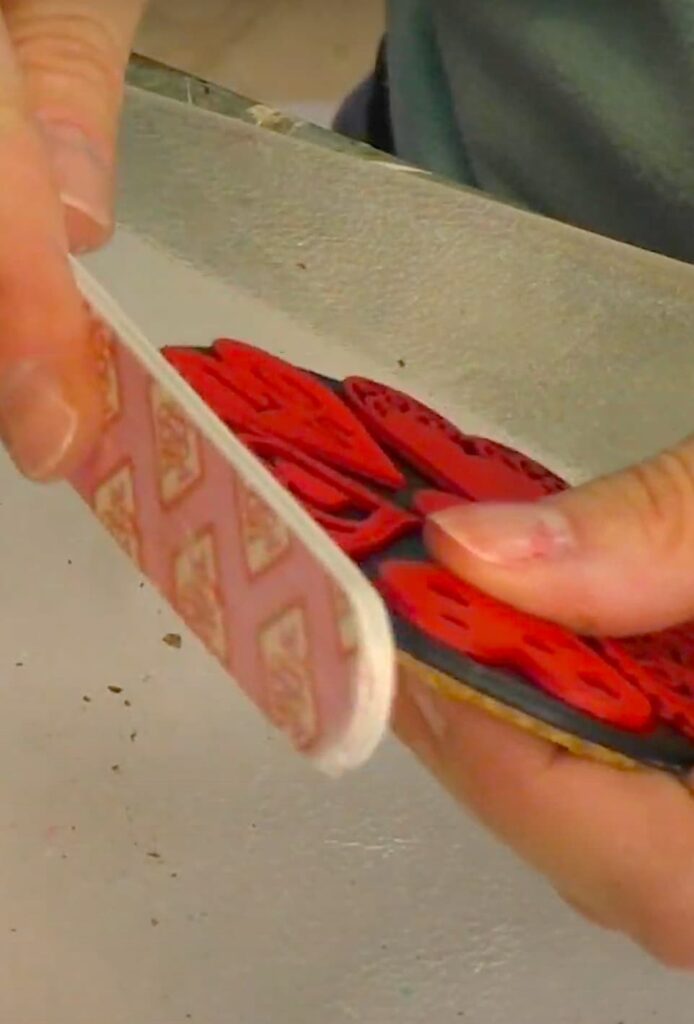
Step 5: Trim and Finish
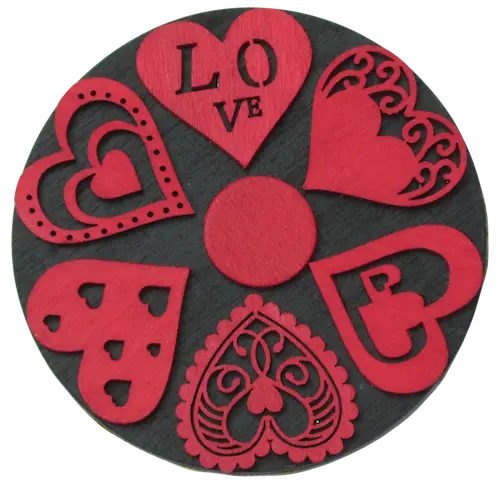
Trim the excess cork with a craft knife, and use a file or emery board to smooth any rough edges. Your DIY Valentine’s Day coaster is complete and ready to use or display!
With durable multi-surface paints, there’s no need for additional sealing, making this a quick and easy DIY project.
Whether you use it as a coaster or wall decor, this craft is a pretty way to celebrate Valentine’s Day.
*To hang them from a wall, use Command strips for a no-damage way to display!
Thanks for stopping by! Remember: Life’s too short not to shimmer, so grab your glue gun and your glitter!™
Mona