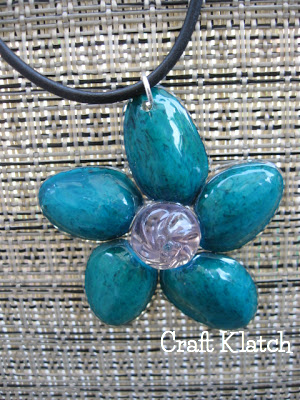
Wow everyone with this pistachio nut shell pendant. It’s beautiful, stylish and completely unique!

Remember to Subscribe to my YouTube channel, so you don’t miss a thing!
For the latest Subscribe: https://www.youtube.com/craftklatch
Here’s the video tutorial:
The first thing you are going to have to do is eat A LOT of pistachios and keep the shells! I boil the shells with a little bit of dish soap and then rinse them in a colander and usually there is a little dark membrane part that needs to be removed. It pops right out after soaking. Then, I will set them out to dry. If it’s nice and sunny out, I’ll put them in the sun.
After they are dry, I will put a fabric dye powder into a plastic bag with hot water and a little bit of salt. I will mix it up well, add the pistachio shells and leave them soaking overnight or until I get back to them. Then I rinse them and again let them dry.

When it’s time to make the pendant, I did the two below in two different ways. I used the Easy Cast Epoxy/Resin and it worked like a charm. It was much easier than I anticipated. Prepare the resin according to the package directions, or you can find a video of me preparing it in my Candy Resin Pendant post.

I lined my work surface with wax paper to protect it. For the red one, I put a dab of resin on the wax paper, put in the glass bead and took the pistachio shells and put them in a flower pattern around the bead. I let it dry overnight and then peeled it off of the wax paper (it was easy). Then, I drilled a small hole in one of the shells and wear it as a pendant!

I did pretty much the same thing with the green pendant, except I coated it with resin as well for a glossy look. I did have to trim around the green one and do minor sanding where I trimmed to smooth out the edges.

Have fun! As always, I’d love to see what you come up with!
You can find Craft Klatch on Facebook!
Happy Crafting!
Mona

how clever they look so pretty, never would have guessed what they were made of
i would