To stay up on the latest, be sure to
SUBSCRIBE to my YouTube Channel!
I had the opportunity to take part in the September Made by Mommy Craft Challenge! It was great!
Kim, from Made by Mommy, puts together packages of random stuff and send them off to a number of different YouTubers and you have to make something. Fifteen other YouTubers took part and all the projects come out totally different! Be sure to check them all out.
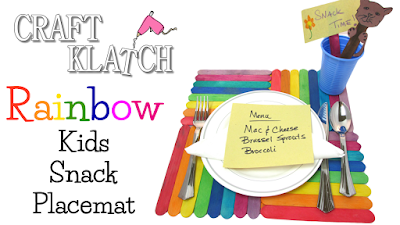
Here’s what I made:
Here’s what I made:

The items I used:
– Shelf liner/bookcover
– Shelf liner/bookcover
– Blue cup
– Crayons
– Construction paper
– Black marker
– Glue stick
– Clear drying glue (not provided)
– Scissors (not provided)
Here is the video tutorial:
Directions:
1. Decide on the size of the placemat and then cut a piece of the shelf liner just a little larger.
2. Lay the shelf liner down on your table, with the backing or sticky side up.
3. Peel off the backing. You will need to put stuff on the corners of the shelf liner, to keep them from curling up while you are working.
4. Take you popsicle sticks and lay them on the shelf liner. I did a rainbow pattern, in alternating directions. Don’t press them down, until you know you have them positioned correctly – you might have to do a little scootch here or there.
5. When in position, press them firmly down on the shelf liner and then flip it over. Rub the shelf liner onto the front of the sticks. This serves two purposes: 1. It keeps the popsicle sticks in place, while you are working on them. 2. Once we add glue, it will keep it from getting on the front of the sticks, which will be the top of our placemat. Everything will just look neater that way.
6. Flip it back over, with the popsicle stick side up. Using a clear drying glue, run a generous bead of glue along all of the seams. Use your finger to run over the glue and make sure it made its way in between the sticks.
7. Glue a popsicle stick along the sections, where they were attached.
8. Glue a popsicle stick on the diagonal, across each section.
9. Let it all dry.
10. I then drew a cat and glued it onto a popsicle stick.
11. I also wrote Snack Time and drew a little flower, with the crayons. You can easily write someone’s name instead. I stuck both in the blue cup.
12. I wrote out a menu with kids favorite foods. All kids like brussel sprouts and broccoli…….right?
13. Once the glue has dried, flip over the placemat and peel off the shelf liner.
Now you have a super cute snack placemat!!
Here are all the other videos, so be sure to see what they made:
Thanks for stopping by! Happy Crafting and stay safe!
Mona
