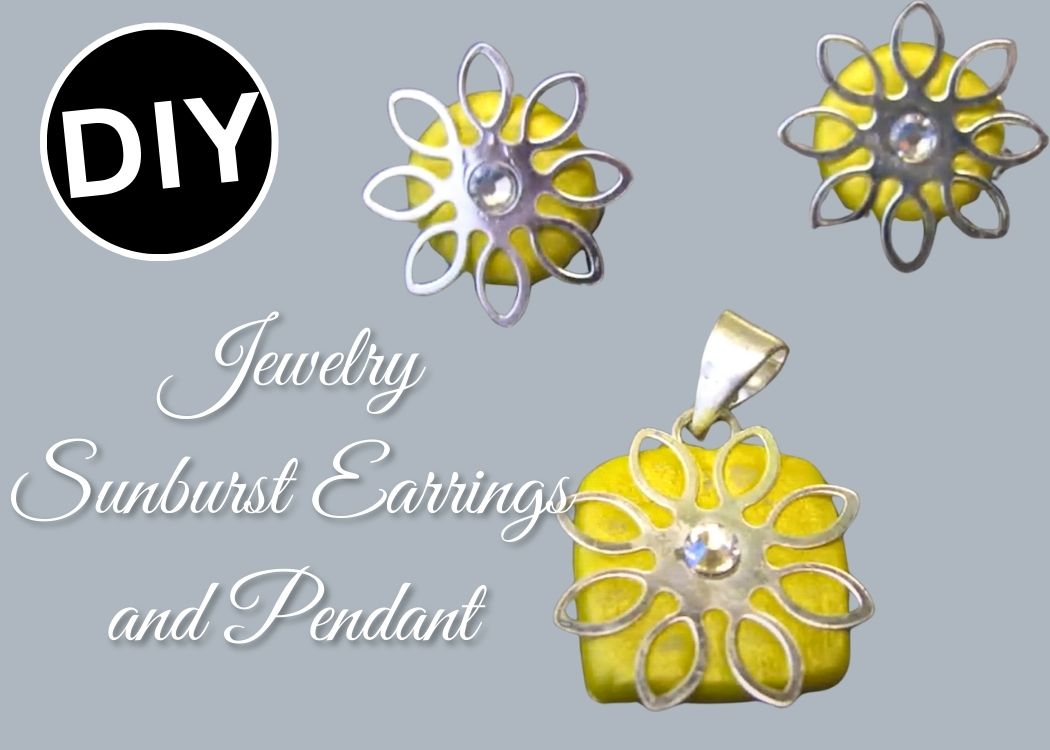
Learn how to make stunning sunburst earrings and a pendant with this simple DIY jewelry tutorial. Perfect for beginners and budget-friendly crafting!
Recently, I stumbled across some great finds in the Hobby Lobby clearance section, and inspiration struck! With a little creativity and some simple materials, I turned those bargains into a gorgeous set of earrings and a matching pendant. This DIY jewelry project is quick, easy, and fun – perfect for anyone who loves to craft unique accessories.
Materials You’ll Need for This DIY Jewelry Project
Here’s what I used to create my sunburst-inspired set:
*This blog uses affiliate links. As an Amazon Associate I earn from qualifying purchases, at no additional cost to you.
- Clip-on earring blanks
- Pendant blank
- Sunburst-shaped metal embellishments
- Jewelry clay
- Pigment powder
- Clear crystals
- Super glue
Be sure to follow me on Instagram!
Let’s Make DIY Jewelry!
Step 1: Prep Your Clay
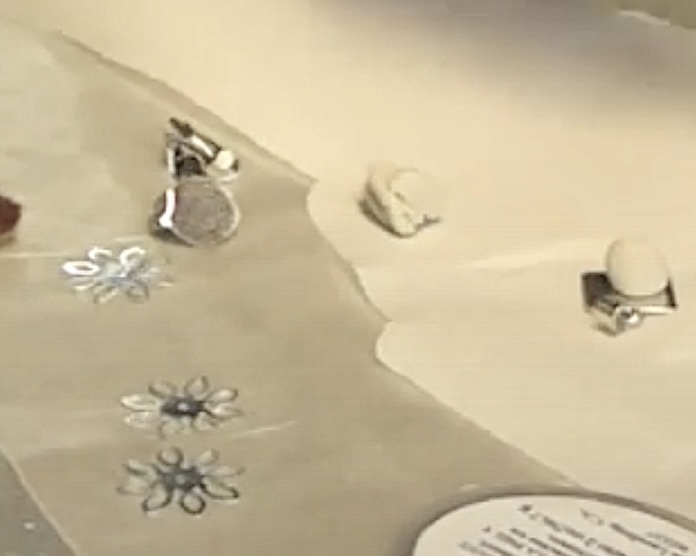
Following the package instructions, prepare your jewelry clay. Follow the directions on the clay you purchase but typically, it’s a one-to-one ratio. Divide it into three pieces: two smaller balls for the earrings and one larger ball for the pendant.
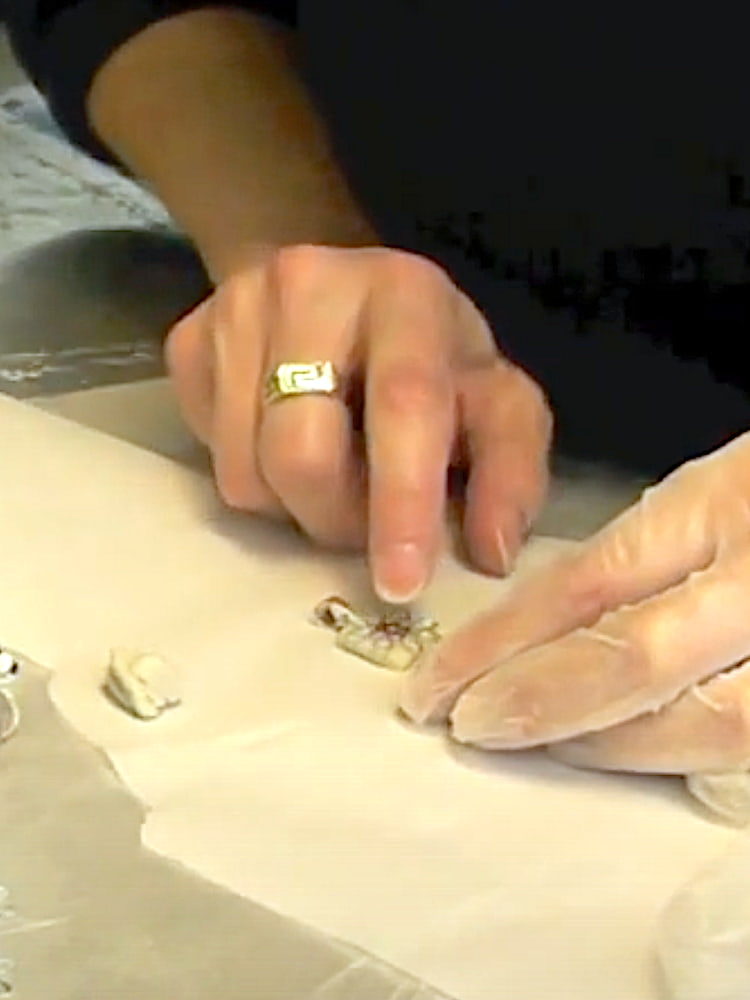
Step 2: Adding the Clay
Take the clay balls and place them onto the respective blanks. Press them down and shape them to your liking. Be sure to wear your gloves while working with the epoxy clay.
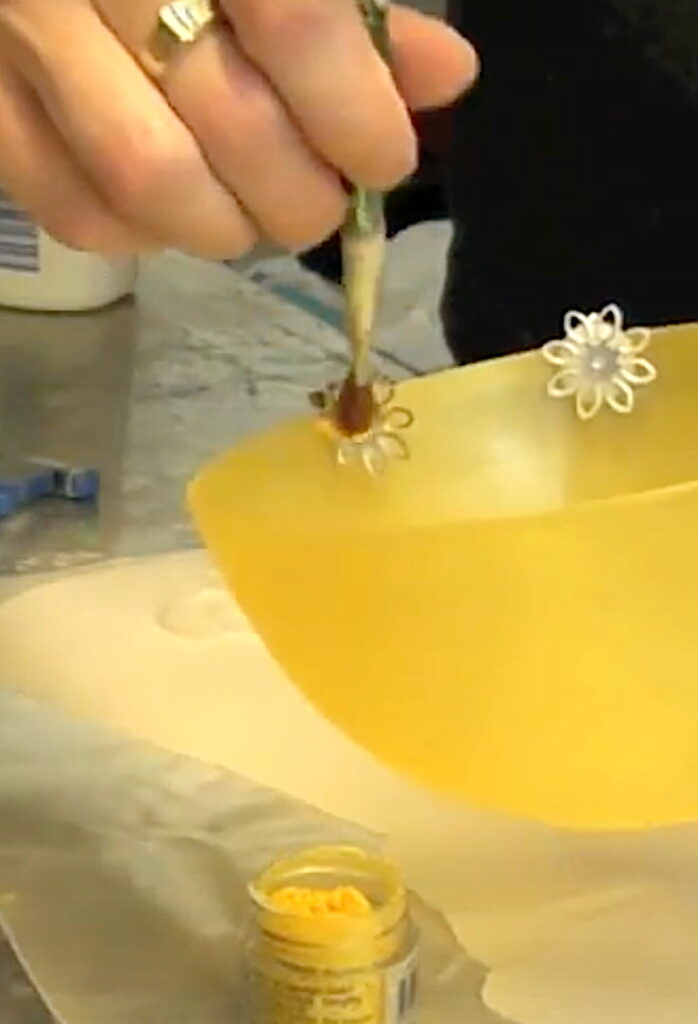
Step 3: Add the Sunburst Design
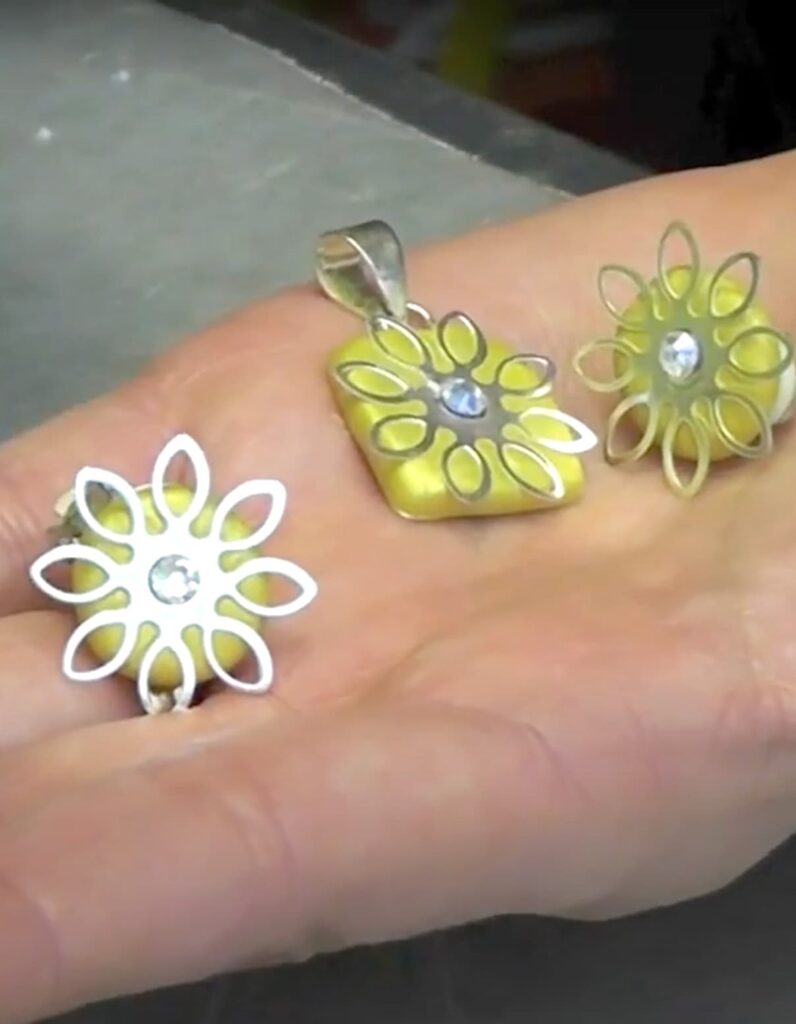
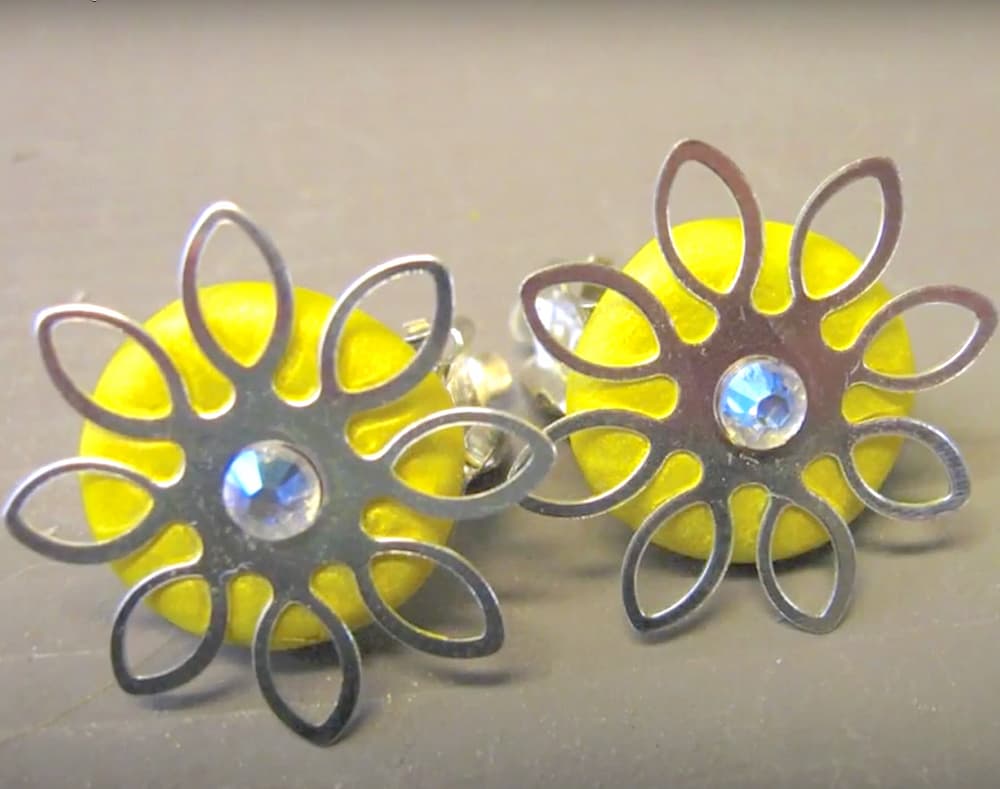
Next, press the sunburst-shaped embellishments into the clay. This will create a beautiful textured design.
To make your pieces shimmer, dust them with yellow pigment powder. There are so many amazing pigment color powders to choose from if you don’t want to go with yellow.
Now comes the waiting game – let the clay cure for 12 to 14 hours. For the earrings, I clipped them onto the side of a bowl to keep them from touching anything while they set.
Step 4: Brush Away Excess Powder
Once the clay is fully cured, brush off any extra pigment powder to reveal your clean, polished designs. Once the clay is cured, the powder and the sunburst charms should be permanently attached to the clay.
Step 5: Add Sparkle with Crystals
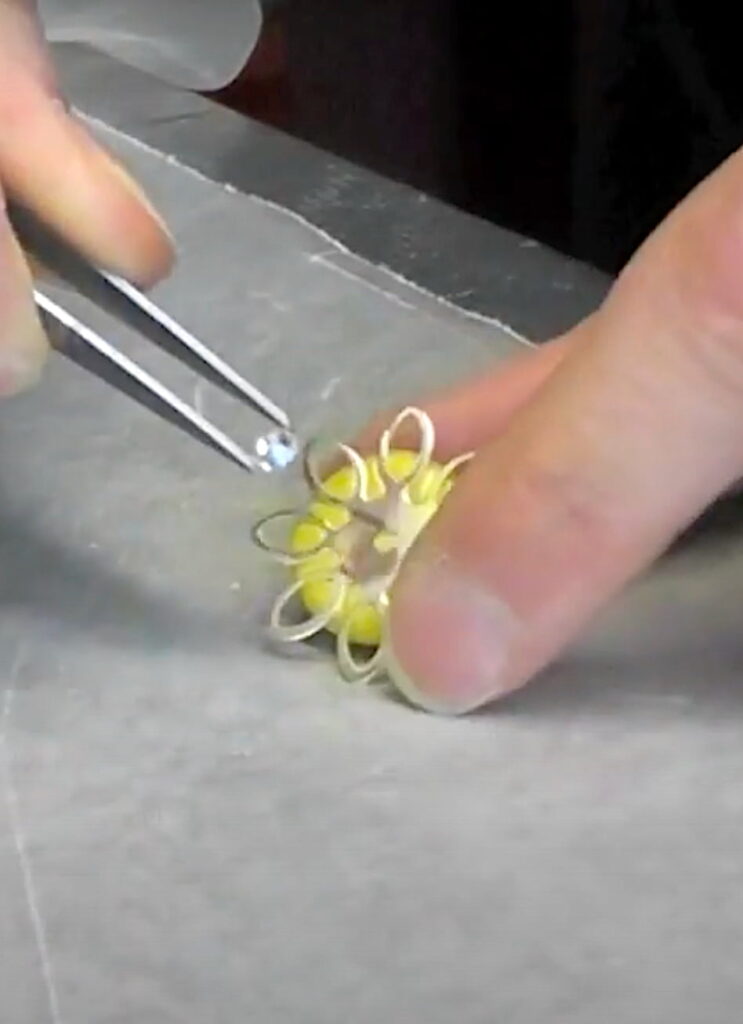
For the final touch, glue a clear crystal to the center of each starburst design. The sparkle adds just the right amount of elegance and completes your DIY jewelry set. I used crystals that had pointy backs but you could use a flat-backed crystal just as easily.
Why I Love Making DIY Jewelry
Creating DIY jewelry isn’t just a way to make something beautiful, it’s a chance to experiment, unwind, and express your creativity. There’s nothing like seeing your vision come to life, and every piece feels personal and special.
Plus, when someone compliments your handmade jewelry, you get to say, “I made this!”
Quick Tips for Personalizing Your DIY Jewelry
- Play with Colors: Don’t be afraid to try bold shades or metallics to make your pieces pop.
- Switch Up the Embellishments: Not a fan of sunbursts? Try flowers, stars, or even abstract designs.
- Add a Personal Touch: Incorporate charms, initials, or beads to make your jewelry even more unique.

Wrap Up
Making your own DIY jewelry is a fun and creative way to craft accessories you’ll love to wear. This sunburst-inspired set is simple enough for beginners, yet looks like a high-end design. Give it a try, and let me know how yours turns out!
More DIY Jewelry Projects
If you enjoyed this project, I have lots of fun jewelry DIYs for you!
Check these out:
- Resin Candy Charms | DIY Project
- Resin Button Pendant
- DIY Gnome Pendant | Resin Jewelry [Video]
- DIY Donut Earrings
- Resin Heart Charms
If You Don’t Want to DIY Jewelry
Remember: Life’s too short not to shimmer, so grab your glue gun and your glitter!™
Mona
