
Create whimsical mushroom decor using a thrifted vase or candleholder to create a mushroom light. Follow this easy DIY tutorial for a magical addition to your home decor.
I went thrifting and Dollar Tree shopping. This project was not what I had in mind when I bought any of these items.
Get ready to transform ordinary household items into enchanting mushroom decor with this simple DIY project.
It’s really kind of magical!
You can create a magical mushroom light that adds a whimsical touch to any space. It’s a touch of fairy tale charm.
The mushroom cap gets extra special treatment!
Materials Needed for the Mushroom Light
*Disclosure: This blog uses affiliate links from Amazon and other retailers. I earn a small amount from qualifying purchases at no additional cost to you.
- Glass vase or metal candleholder (find one at a thrift store)
- Plastic plant saucer (available at Dollar Tree) – you can substitute a clear bowl
- Permanent vinyl
- Triple Thick spray
- Tap light
- Paint for pouring (various colors for interest)
- Circle punch, Cricut, or a pair of scissors
Mushroom Decor Mushroom Light Video Tutorial
Step-by-Step Instructions for Easy Mushroom Decor:
Step 1: Preparing the Mushroom Cap
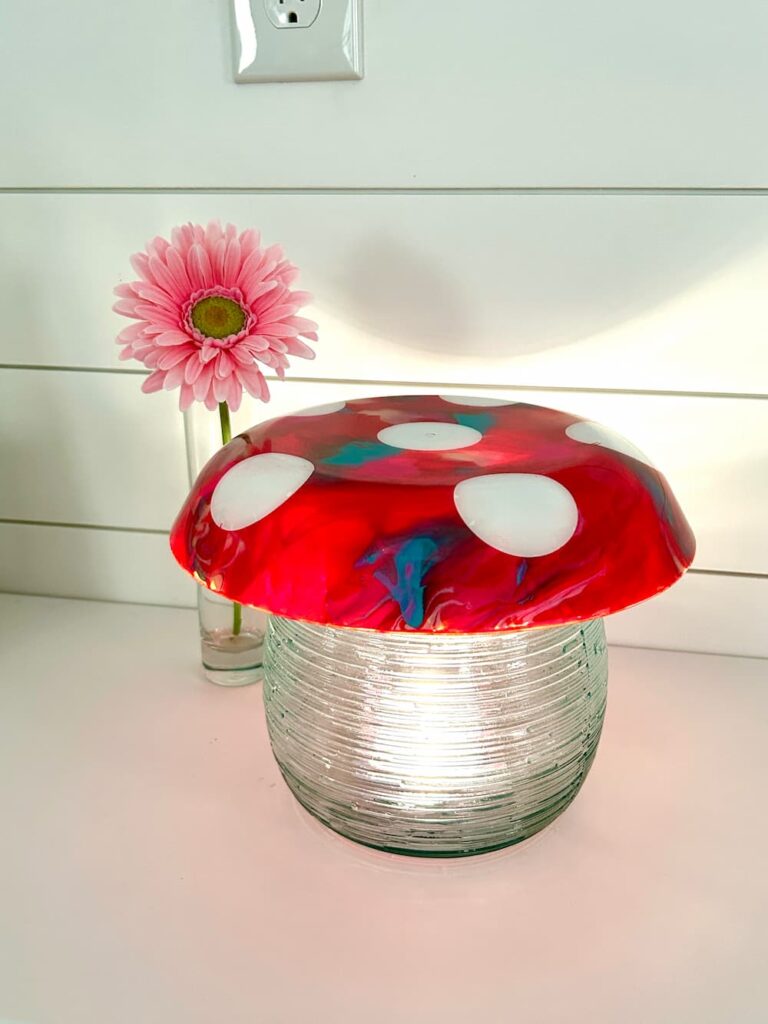
When I think of mushroom decor, I always think of the white dots on the mushroom cap.
It’s just what is in my brain.
So, it would seem like white dots on the mushroom light are in order.
To cut the vinyl circles, I could have freehand cut them or used my Cricut. However, while looking for something else, I realized I had a large circle punch that would be much quicker and much easier.
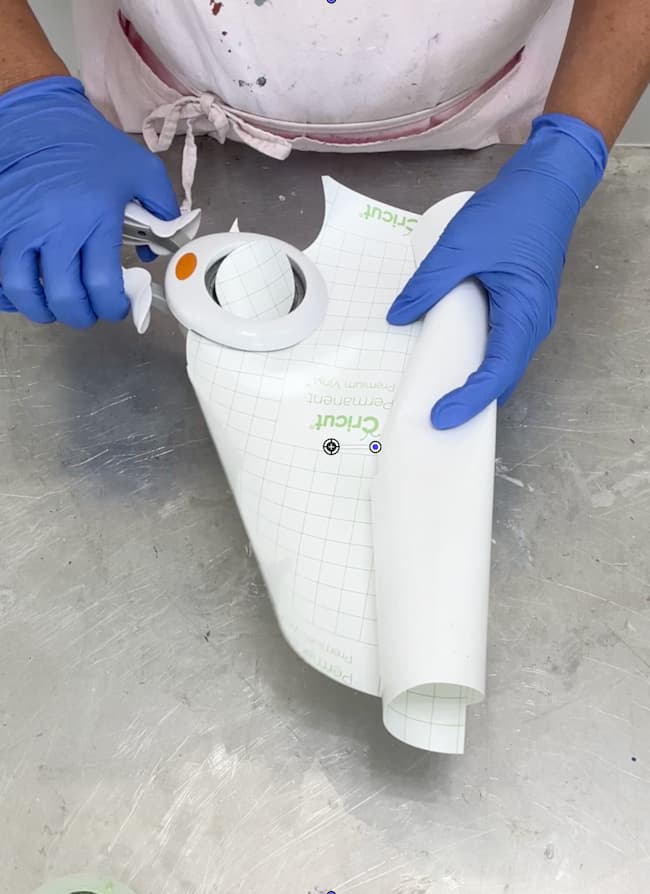
Whichever way you want to create your circles is totally fine. They don’t have to be perfect. A mushroom cap is a natural thing and therefore not perfect!
I started by cutting the circles.
Then, I place the circles on the underside of the plastic plant saucer. I just tried to evenly spread them out.
I should quick mention that I did clean the plant saucer with rubbing alcohol so everything would stick. Oh! And I also wore gloves, so I wouldn’t get any grease on the plastic.
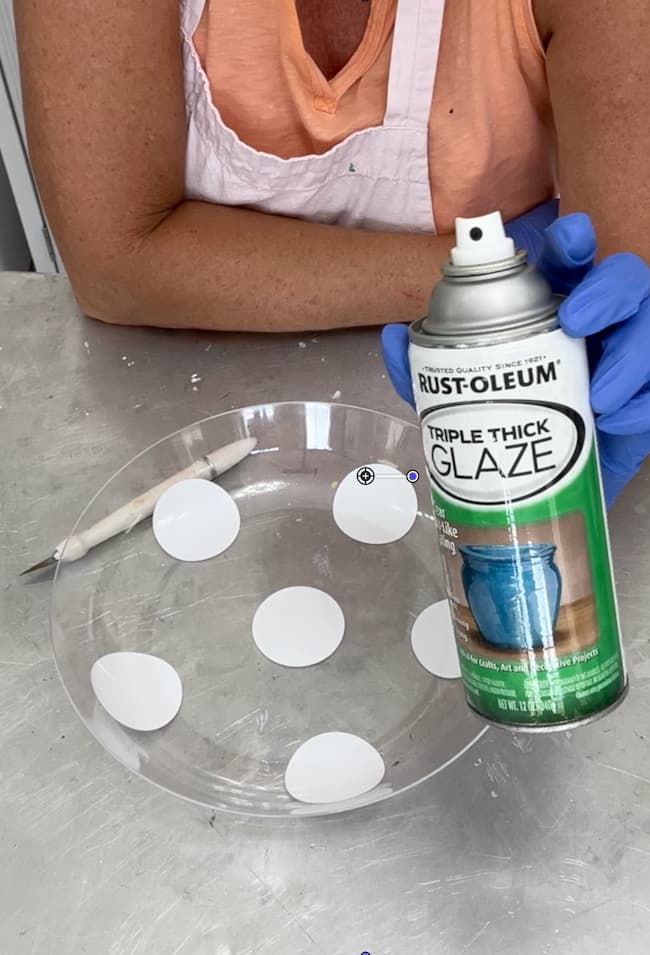
To seal the mushroom cap dots, I sprayed a layer of Triple Thick to the underside of the saucer, where I applied the circles. This also gives the paint something to adhere to, instead of the plastic.
FYI: The Triple Thick dried to look like a frosted finish. I was a little concerned about that but it didn’t seem to matter in the next step.
Step 2: Adding Color to the Mushroom Cap
I’m all about paint pouring right now, so I thought it would give the mushroom light a fun look instead of going just straight red.

I used Plaid’s FolkArt Drizzle paint and Apple Barrel’s Ready Pour Paint.
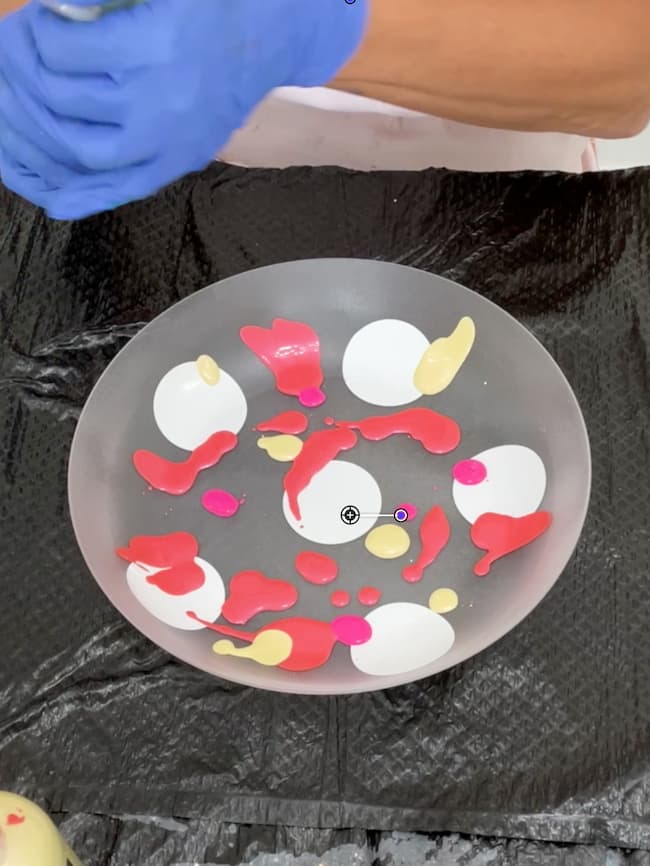
I should note that you can make this mushroom decor go with any colors in your house. It does not need to be red. It could be purple or green or black or any color!
I poured various colors and let them flow over the surface. I had to move the saucer around to help them reach areas that weren’t covered. Just take it slow and let it flow!
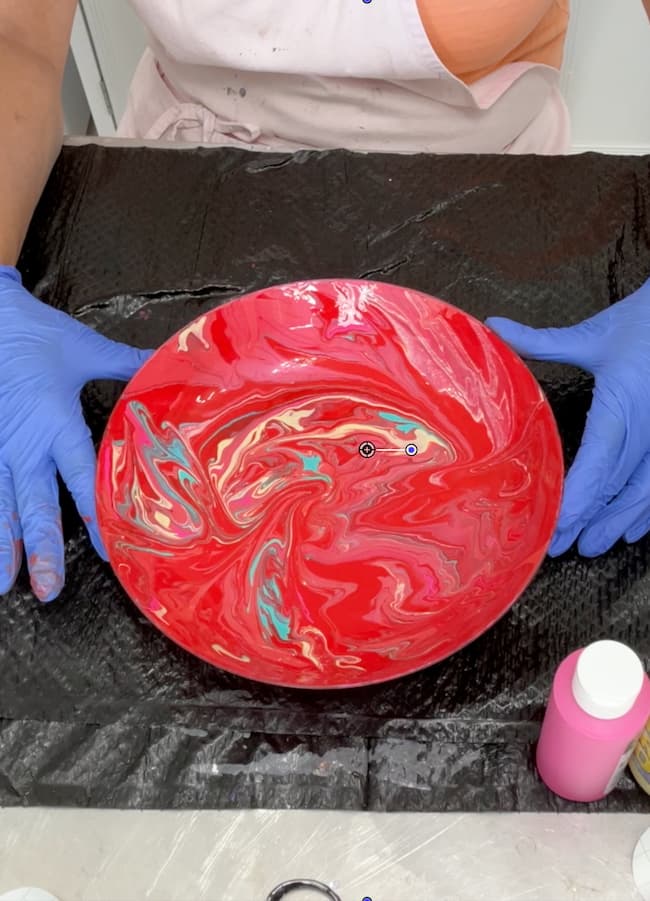
The mushroom light is going to look great!
Then, you just need to let the paint dry thoroughly. It can take overnight, a day, or a couple of days. It depends on how think the paint is, the temperature, and the humidity.
Step 3: Assemble the Mushroom Light
Are we ready to make the mushroom decor come to life?
Take the tap light and put it in the candleholder or the vase.
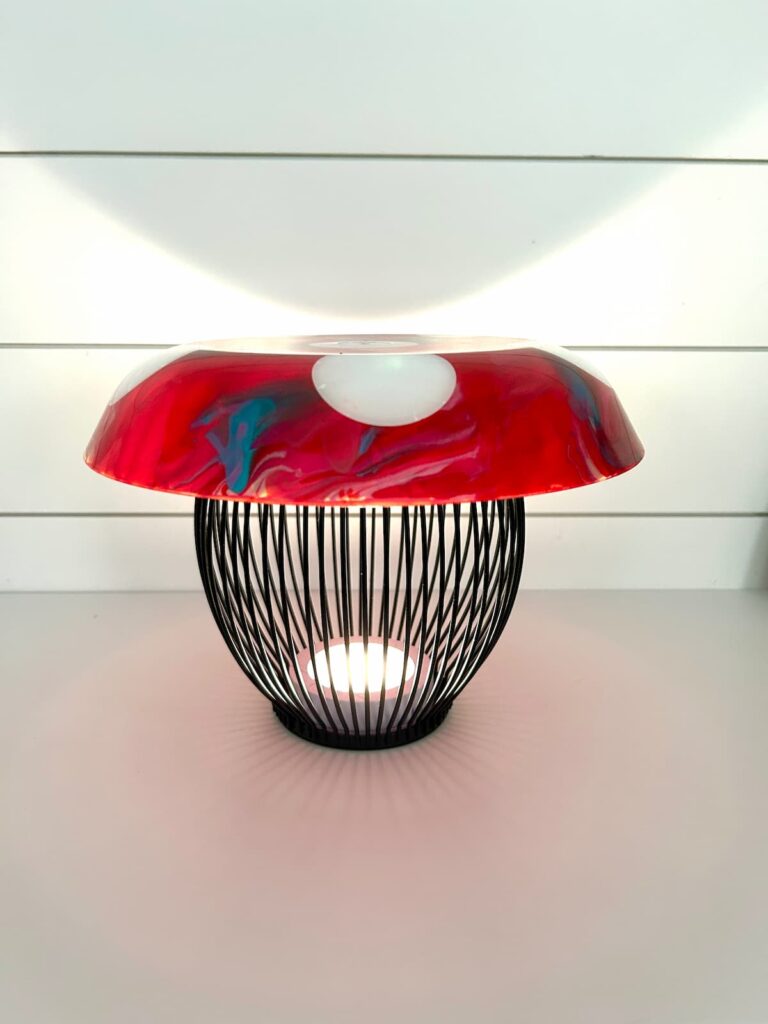
A little aside, I bought the black candleholder and it was supposed to be part of a mushroom project…but not this one specifically.
When I was putting the mushroom together, I saw the glass vase – which I thrifted for a resin pouring project – and decided to try it with the mushroom cap I just made.
Tell me which version you like better.
Place the painted plant saucer and place it upside down on top of the candleholder or vase.
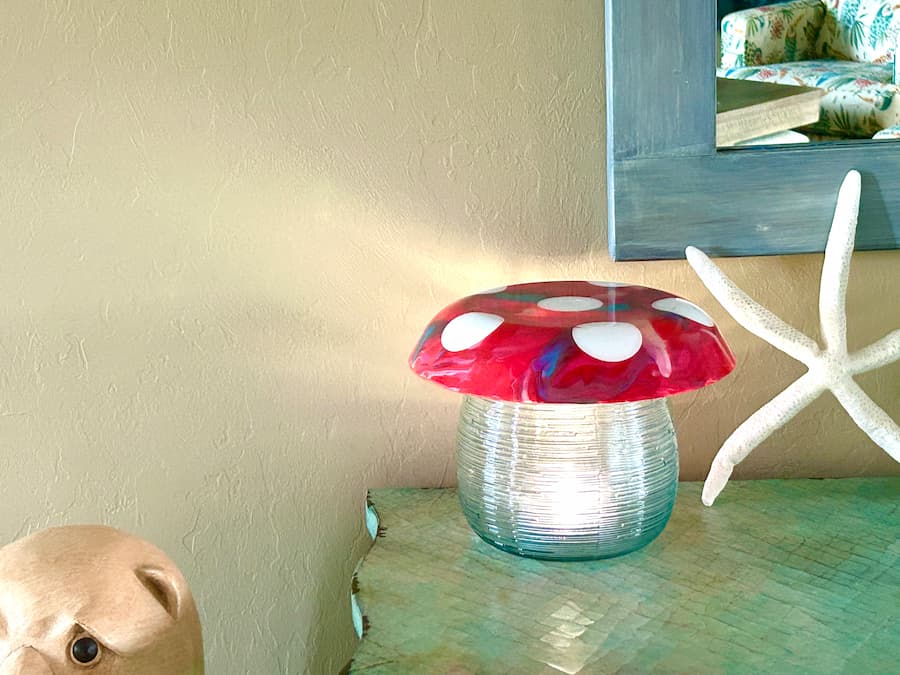
It should look like a mushroom cap on a stem…stump…what do you call the base of a mushroom?
Turn the tap light on and the light shines through the lines of the candleholder or through the glass of the vase, creating a magical ambiance.
Tips and Tricks and Other Ideas:
- Experiment with different paint colors and pouring techniques to achieve unique and stunning effects. You might give resin a try, so the light shines through the mushroom cap too.
- If you’re using a glass vase (that doesn’t have a pattern), consider adding some decorative elements inside the vase for an extra touch of creativity.
- For a more rustic look, you can use a metal candleholder and instead of bright colors, pair it with earthy paint tones.
Enjoy the new mushroom light as a charming piece of mushroom decor or mushroom art that adds a whimsical glow to any room. This easy and affordable project is perfect for craft enthusiasts of all skill levels.
Other Projects You Will Love!
Here are some other whimsical and dare I say magical projects you will love. They aren’t all mushroom art related but at least one is a mushroom!
- DIY Resin Cactus Coasters
- Bee Honeycomb Resin Coaster DIY [Video]
- Whale of a Sock Holder | DIY Projects
- Magical Tooth Fairy Idea DIY [Video & Free Printables]
- DIY Gnome Pendant | Resin Jewelry [Video]
- Mushroom Decor Phone Charging Stand
Fun Mushroom Decor
The mushroom light is such an easy project but here are some other mushroom decor options you might enjoy:

I like the glass vase better. The dots are okay, but I could take them or leave them.
Thanks, Cheryl! I agree. I’m on the fence about the dots. I think they need to be different if at all. I’m definitely onboard with the glass base.
So BRILLIANT, Mona!
Thanks for sharing at the Creatively Crafty Linky Party, we will be featuring you this week!
Creatively, Beth
Thank you so much, Beth! ❤️
That is the cutest idea! We were just searching for a lamp for my son’s dorm and he would love something like this.
Thank you, Joanne! That would be so fun for a dorm room!
I love this project! I prefer the glass vase but the other one is nice too. I like the way the light shines out of the glass. I’m not so sure about the dots Maybe smaller or left off completely.
Thank you, Penny! I like the glass one better too. I definitely didn’t get the dots quite right!