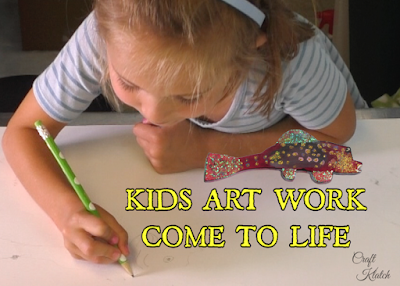
Learn how to turn your kid’s artwork into wall art! It makes their artwork come to life and creates sentimental home decor! ❤️

My granddaughter, Reagan, joined me in today’s project. She wanted to make a fish to hang on the wall of the lake house. She took the project from start to finish! I’m very proud of her!
Here is the video tutorial, where you can see how Reagan and I made it and she does a little extra entertaining…she’s quite the hambone:
Materials list:
Paper or poster board: go to the dollar store!
Plywood: https://amzn.to/2YpI0RH
Saw: https://amzn.to/30W9jVv
Unicorn Spit (Red): https://amzn.to/2Zsbnnf
Unicorn Spit (Zia Teal): https://amzn.to/2Zsbnnf
Unicorn Spit (Dark Teal): https://amzn.to/2L0mP5l
Paint markers: https://amzn.to/2JWAw4E
Mod Podge: https://amzn.to/2MI0c7P
Gold glitter: https://amzn.to/2zoZfbN
Pink glitter: https://amzn.to/2MFUPWU
Torch or lighter: https://amzn.to/2ybHdtc
Hanging strips: https://amzn.to/2zt7iVm
Resin (use whatever resin brand you like):
Easy Cast: https://amzn.to/2yjYmBC
Art Resin: https://amzn.to/2yk9X3z
Clear Cast: https://amzn.to/2z4rxGw
This is the resin I used for this project:
FX Poxy: https://amzn.to/2AF3Pkk ~ According to the manufacturer, this one is heat resistant to 500 degrees F.
Directions:
1. Reagan drew a fish, but kids can create anything! If they don’t know how to draw something off the top of their heads, pull up a drawing of a fish, car, dog, sailboat, or whatever they want to draw and let them use it as a reference. They will totally make it their own! They will just use basic shapes and features and a guide.


2. I cut it out, making a template that we could trace.

3. I held it down, while Reagan traced it with a marker.

4. I cut it out with my saw.

5. Reagan sanded it, to get off the marker and smooth the edges.

6. Reagan saw the Unicorn Spit in my craft room and wanted to use it. Originally, she was going to do dots. Then, she decided to brush. It was ever changing!


7. Reagan used paint markers to make spots on the fish.


8. She also used the markers to draw the eyes and outline the fish.

9. Reagan wanted to add glitter highlights. I added Mod Podge to the fins and she poured on the glitter. Then, we tapped off the excess and put it back into the glitter jar.


10. We repeated the process with the gold glitter and made gold spots.


11. Here is the fish so far! To make it even better, we decided to add resin!

12. We raised the fish up on cups, so any excess resin could drip off and not pool around the fish. I had added tape to the bottom, before pouring the resin, which I’ll show you later.

13. I poured the resin over the fish.

14. I moved the resin to the edges and covered the sides.

15. I popped the bubbles with my lighter and let it sit for a minimum of 12 hours before handling.

16. Here you can see how I covered the back of the fish with painter’s tape.

17. I used my craft knife to cut along the edge. The resin has cured about 12 hours, so it has not fully cured and is not completely hard. Therefore, it makes it easy to cut through and remove the tape.


18. Before I put the tape on it, I had Reagan sign it and I dated it.

Here it is all finished! We are going to add Command Hanging Strips to hang it on the wall.


