
Learn how to use epoxy resin for countertops with this DIY project. From prep to pour, follow the journey and see a formica bathroom countertop transformation!
Have you ever thought about using epoxy resin for countertops? I definitely have – but I’ve never done it. It was one of those “maybe someday” ideas. Well…someday has arrived!
You might need a bit of back story…
I’ve been working with resin…FOREVER. I’ve poured it into coasters, swirled it into artwork, and poured it on vases and shaped it into bowls.
But a countertop?
That was uncharted territory for me.
Enter my cousin – an avid camper who’s always ready for an adventure, whether it’s in the woods or with a DIY project. While she was snowbirding down here for the season, she casually mentioned she wanted to redo the bathroom countertop in her camper- and she wanted me to do it.
Now, it’s a small countertop, sure – but it’s not mine. What if I messed it up? Cue the stalling – months of stalling. Some of my delays were legit…but honestly, some were just me being nervous about the whole thing.
Fast-forward to the end of her trip. She finally wore me down, and I agreed to give it a go…but she had to do it with me.
And you know what? I was scared for no reason. It wasn’t nearly as intimidating as I thought – and I’m taking you along for the ride of using epoxy resin for her countertops in the bathroom.
Epoxy Resin for Countertops
The first thing we had to consider was deciding which epoxy resin to use on the countertop. After doing some research, we decided on THIS resin.
We selected a quick curing resin since that was their only bathroom, and we wanted to get them back to using it as soon as possible.
What We Used for the Countertop Makeover
*Disclosure: This blog uses affiliate links from Amazon and other retailers. I earn a small amount from qualifying purchases at no additional cost to you.
Discussions and Planning
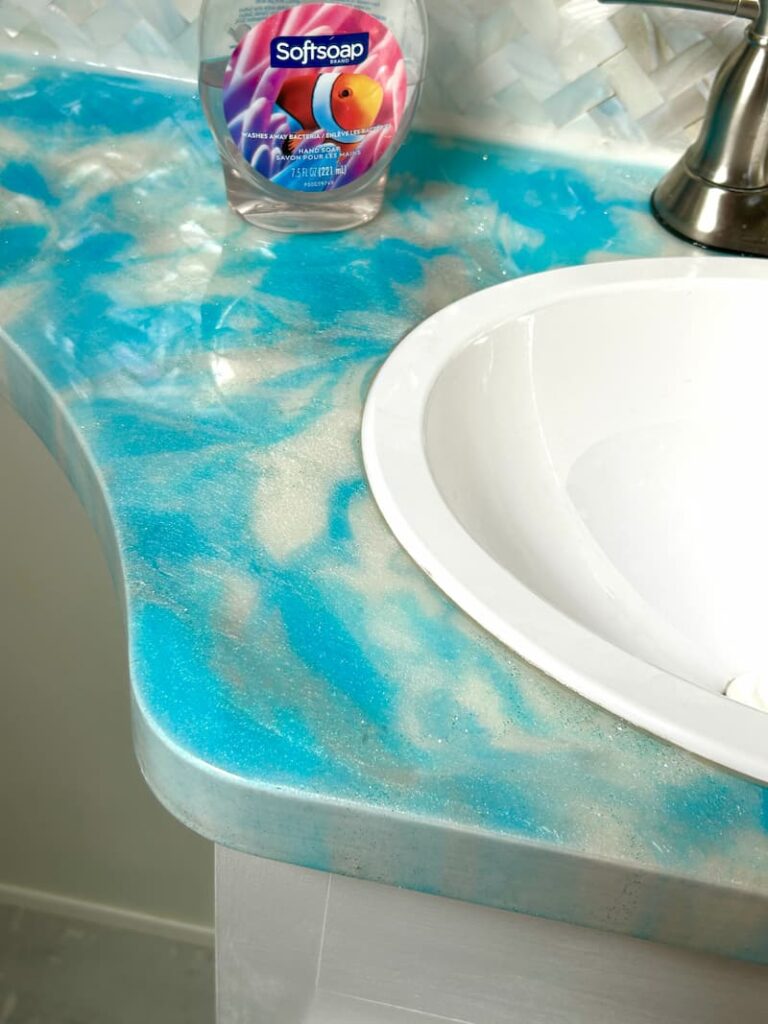
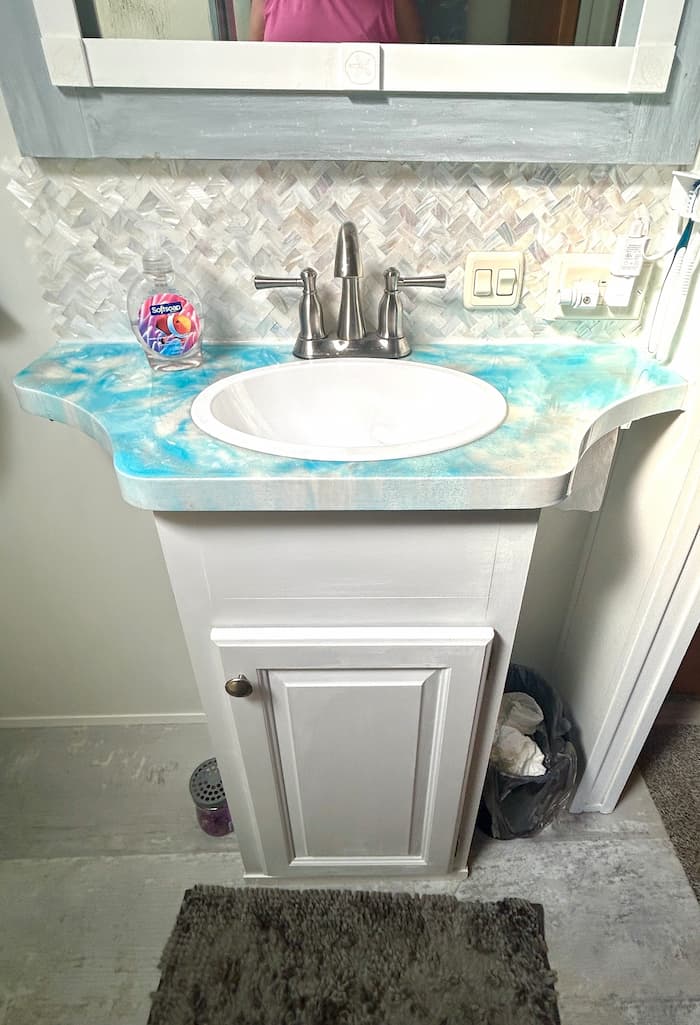
We discussed what she wanted…at length. Originally, I thought she wanted solid glitter countertops. Upon further discussion, I realized she wanted some white and gray to go with the mirror she made last year, also some blue swirls, and a bit of glitter.
How to Use Epoxy Resin for Countertops Video
Prepping the Bathroom Countertop
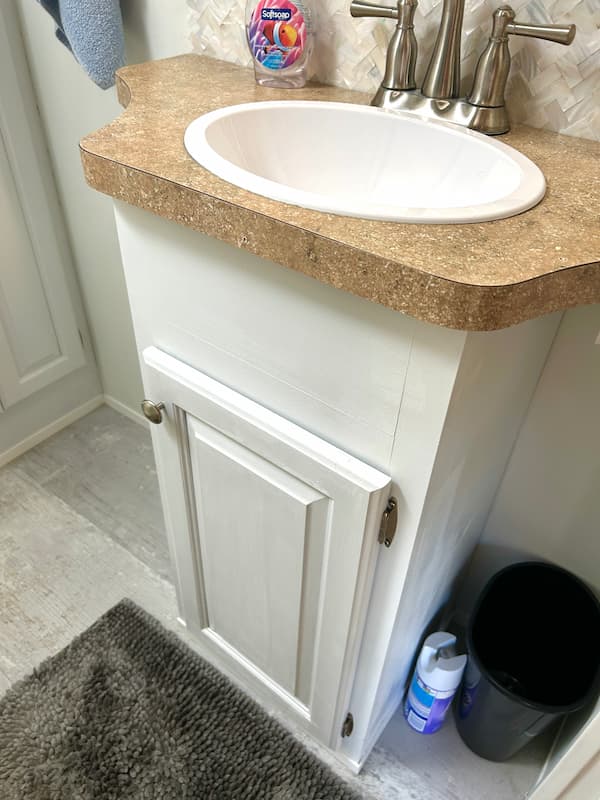
My cousin had been thinking about giving the bathroom a makeover for a while, so she had already painted the brown cabinetry white. I ordered her a new white sink, instead of the original cream one that came with the camper.
The original countertops were brown and didn’t really go with the newly painted, fresh white cabinetry.
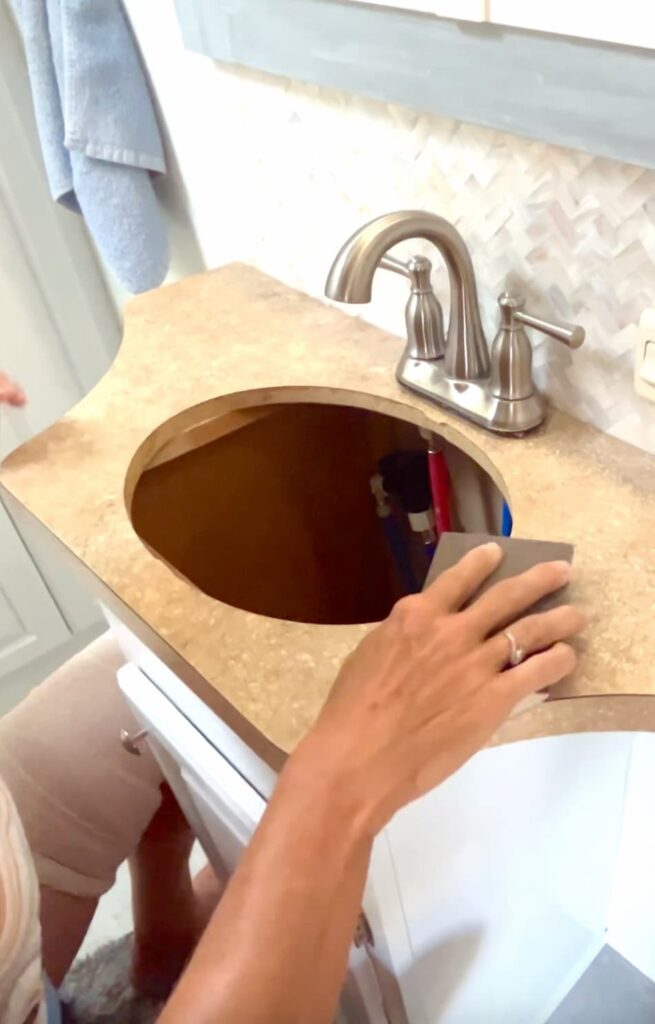
She removed the old sink, we roughed up the Formica countertops with sandpaper, and she used a very sticky primer for the base coat.
We taped garbage bags everywhere and anywhere we thought it could leak and on the floor, in case we dripped.
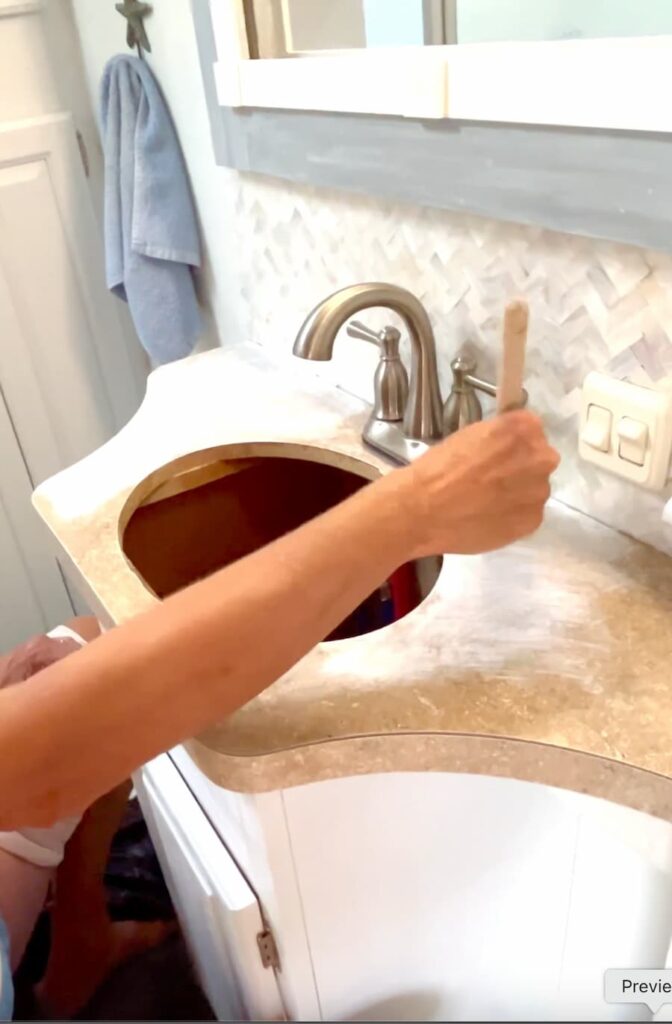
Once the garbage bags were up, and the two coats of primer had fully cured, it was time to break out the resin.
Using Epoxy Resin for Countertops
This is where I got nervous again. I told her how to mix, how quickly we needed to work, and all the steps…about five times…just in case she wasn’t listening.
The quick curing resin gave us a limited working time.
Step 1: We Mixed
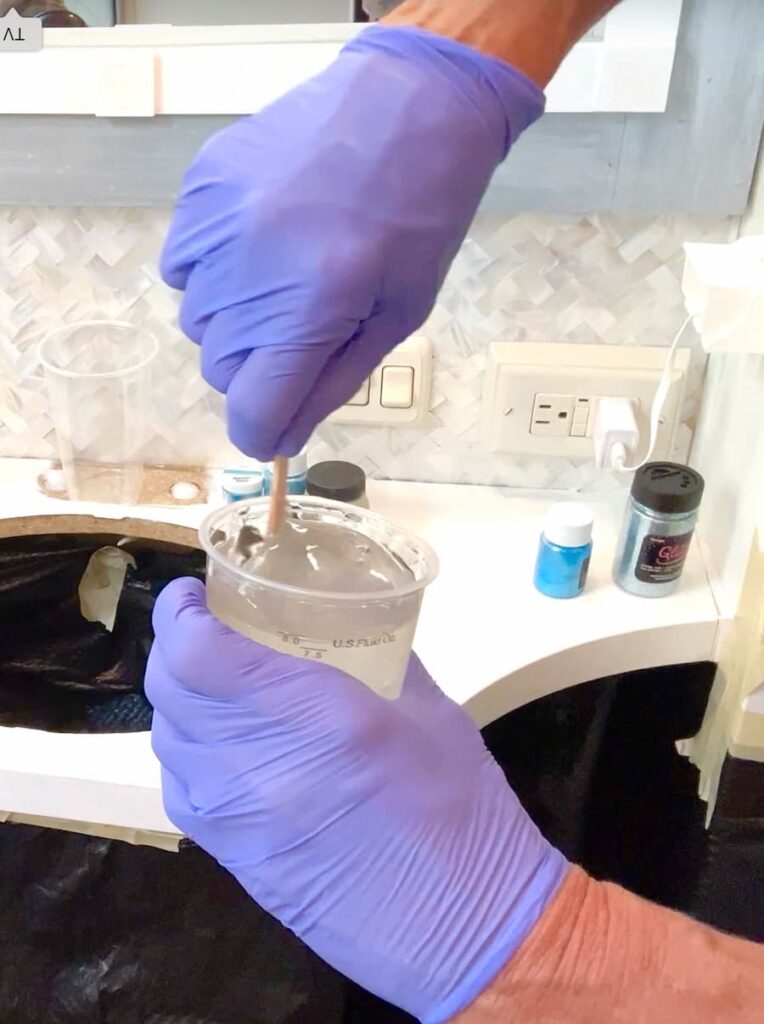
We mixed the resin according to the package directions. Once the epoxy resin was well mixed, we separated the resin into multiple cups and mixed in the different pigment powders and a bit of glitter.
Step 2: We Poured
When we had it all mixed, we immediately started pouring. We alternated the colors and used the stir sticks to make sure the resin made it to the edges by the wall and that it ran down the side edges and covered those, too.
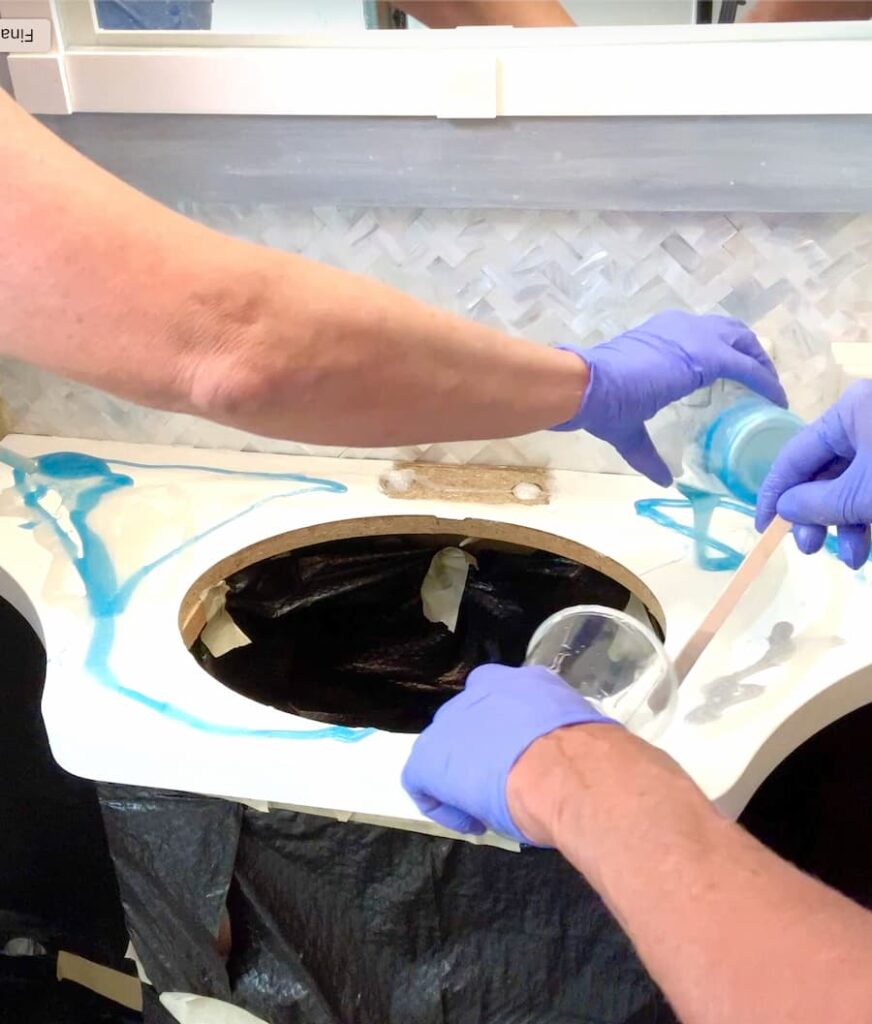
We continued to scrape the underside to keep the drips at a minimum…that saved a bunch of work later.
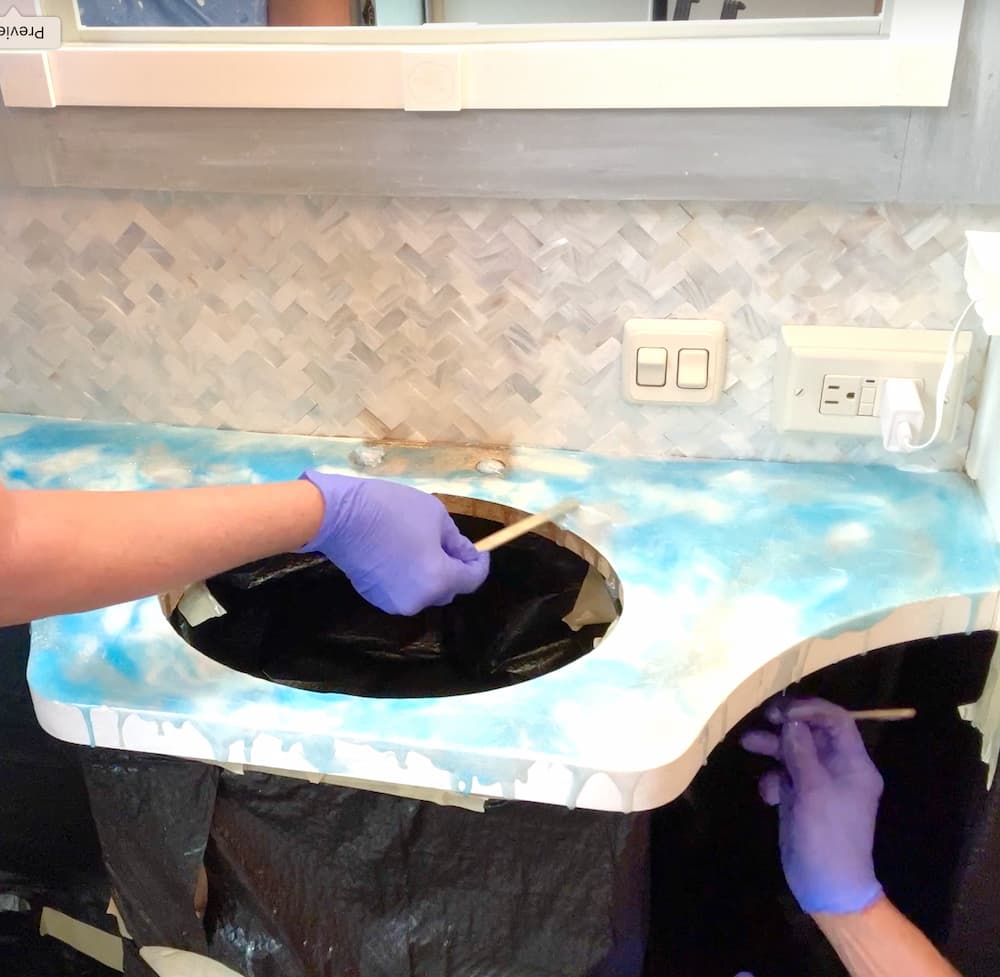
Once everything was covered, I broke out my heat gun and quickly ran it over the countertop to pop the bubbles.
Step 3: It Cured
When the pouring and fussing were all over, we stepped away and let everything just cure. It can be hard to walk away. You might want to keep doing one more thing, but once the resin starts curing, you are only going to mess it up.
Resist the urge!
The Reveal!
My cousin said it was just what she was hoping for and she loves it. That’s all I needed to hear.

If someone asks me again, I’ll be less hesitant about using epoxy resin on countertops. It was pretty fun.
Now that you know how to use epoxy resin for countertops, let me know what you think! Have you tackled doing a makeover on your countertops?
Other Home Decor Projects You Will Love!
- 10 Living Room Couch Ideas
- Affordable Outdoor Chaise Lounge Chairs
- Cupcake Home Decor | Resin Lamp DIY
- Big Glam Resin Gem Paperweight DIY
Thanks for stopping by!
Remember: Life’s too short not to shimmer, so grab your glue gun and your glitter!
Also, follow me on Instagram!
Mona