
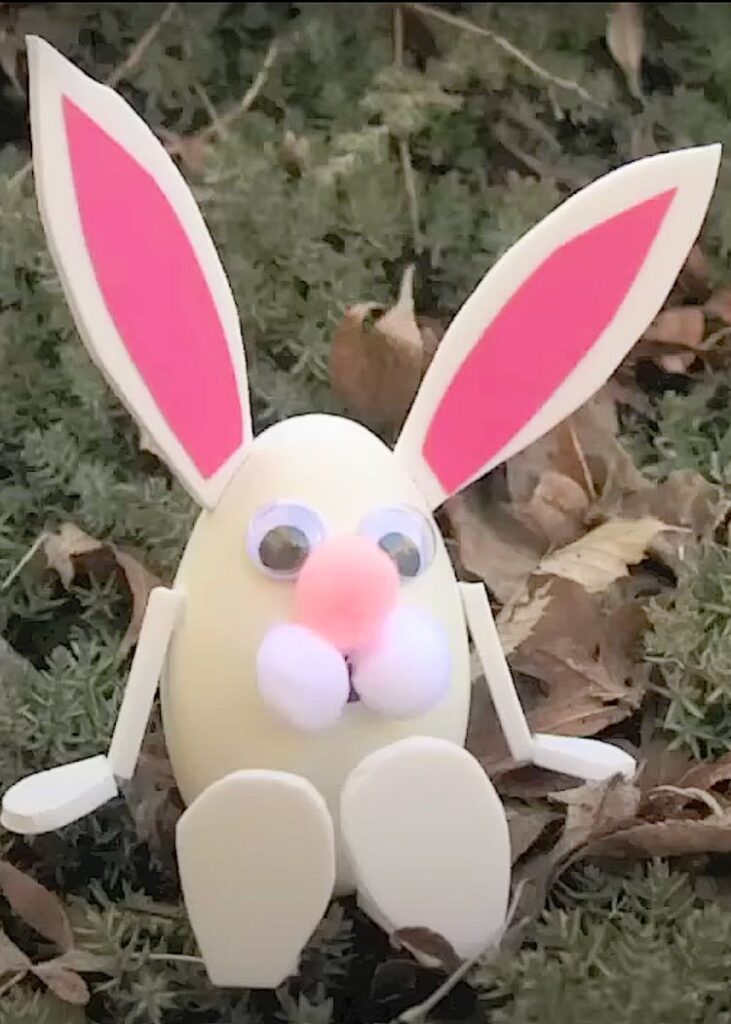
Create an easy Easter Bunny craft with simple supplies! A fun DIY for kids, perfect for decorations or table place cards. Quick and adorable!
Here’s a fun and easy Easter Bunny craft to make with the kids. This adorable bunny makes a great decoration or cute place card holder for your Easter table.
Supplies You Will Need for the Easy Easter Bunny
*Disclosure: This blog uses affiliate links from Amazon and other retailers. I earn a small amount from qualifying purchases at no additional cost to you.
- White craft foam
- Pre-painted wooden egg
- 2 Small white pom poms
- 1 Larger white pom pom
- 1 Small pink pom pom
- Pink paper
- Google eyes
- Glue (I used hot glue)
- Black marker
Here is my video tutorial:
Directions:
Step 1: Prepare the Bunny Parts
The egg is pre-painted so that saves a step. Cut ears
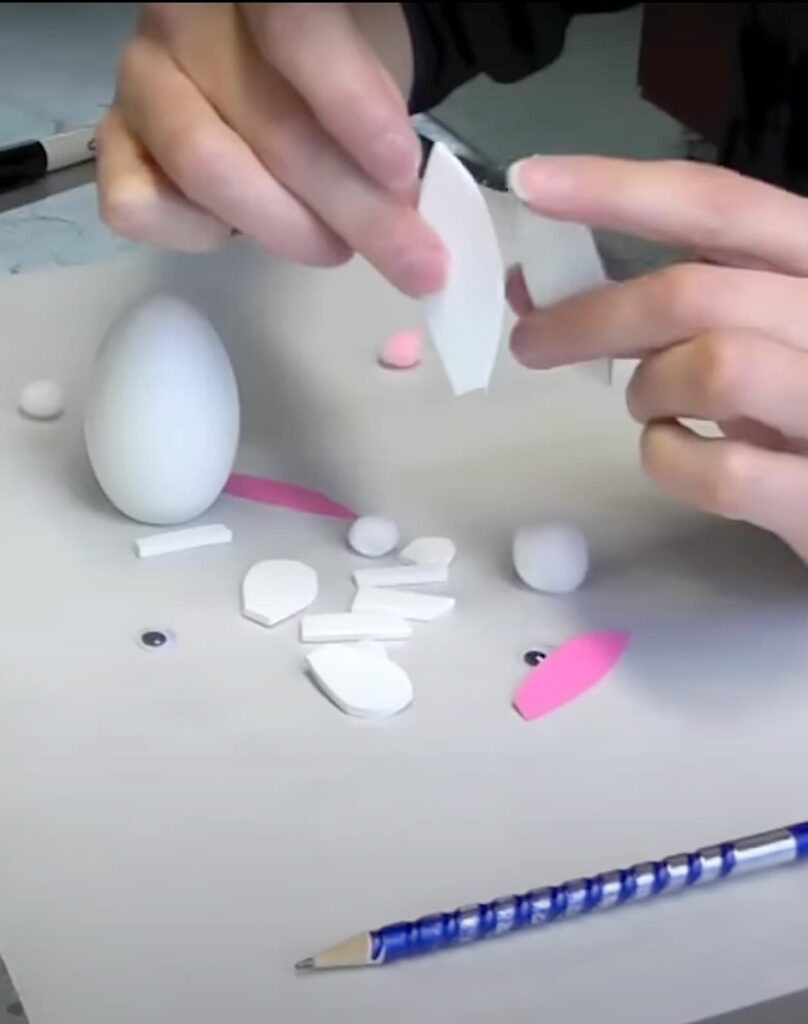
Cut ears, arms, legs, hands, and feet from white craft foam.
Angle the bottom of the ears so they fit snugly against the egg.
Cut inner ears from pink paper and glue them onto the white ears.
Step 2: Assemble the Bunny Face
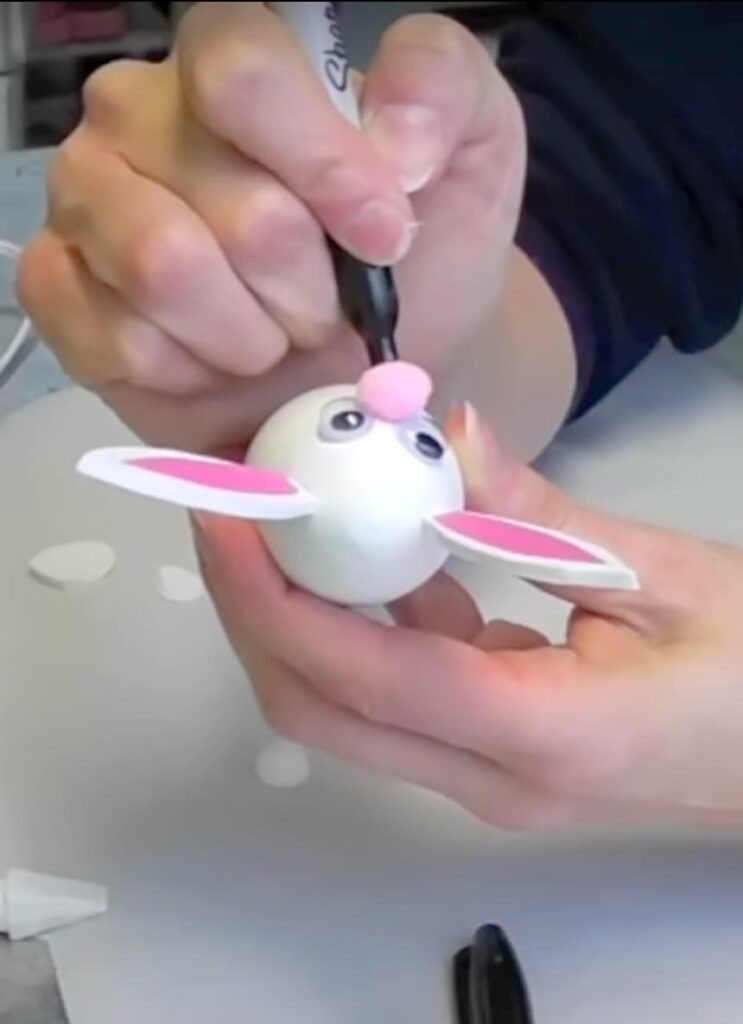
Glue on the googly eyes and pink pom pom nose. Draw a mouth under the nose using a black marker. Attach two small white pom poms just below the nose as cheeks.
Step 3: Attach the Body Parts
Glue the ears onto the top of the egg.
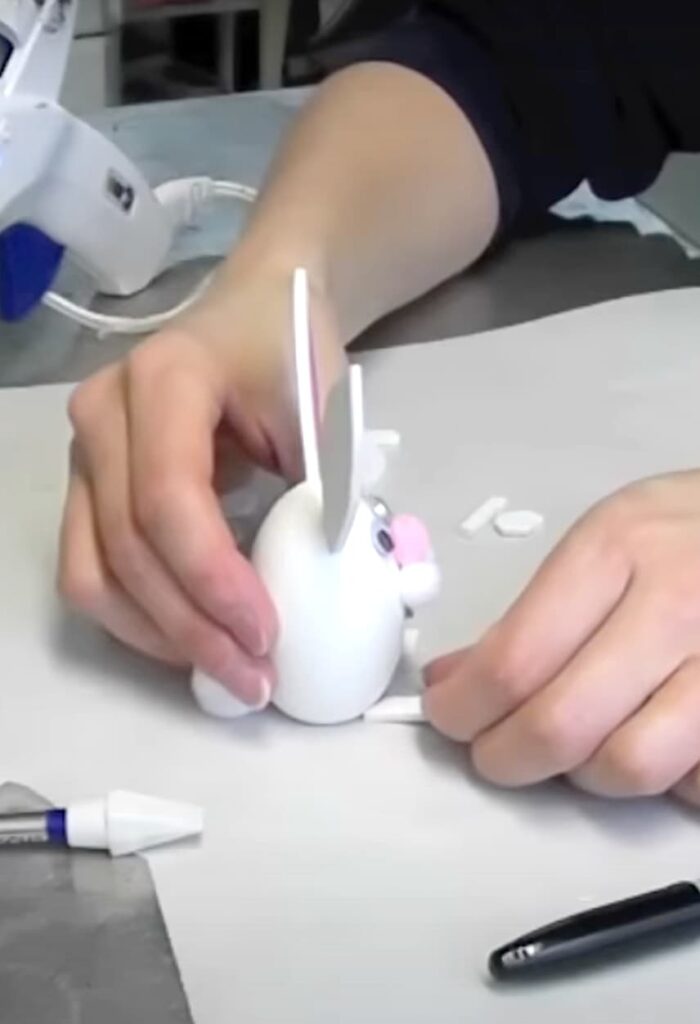
Secure the arms, hands, legs, and feet in place with glue.
That’s it! Your adorable easy Easter Bunny is ready to hop into your Easter decor.
Want More Easter Crafts?
If you enjoyed this project, you are going to love these:
- Easy Easter Bunny Art DIY
- The Easter Bunny is Real Sign DIY [Video]
- Easy Easter Chick Craft Tutorial
- Easter Crafts Easy Cute Chick Charms
Remember: Life’s too short not to shimmer, so grab your glue gun and your glitter!™
Mona