Hop into Easter fun with these DIY Easter crafts! Create a cute chick decoration in 5 easy steps. Perfect for your holiday décor or fun with kids!
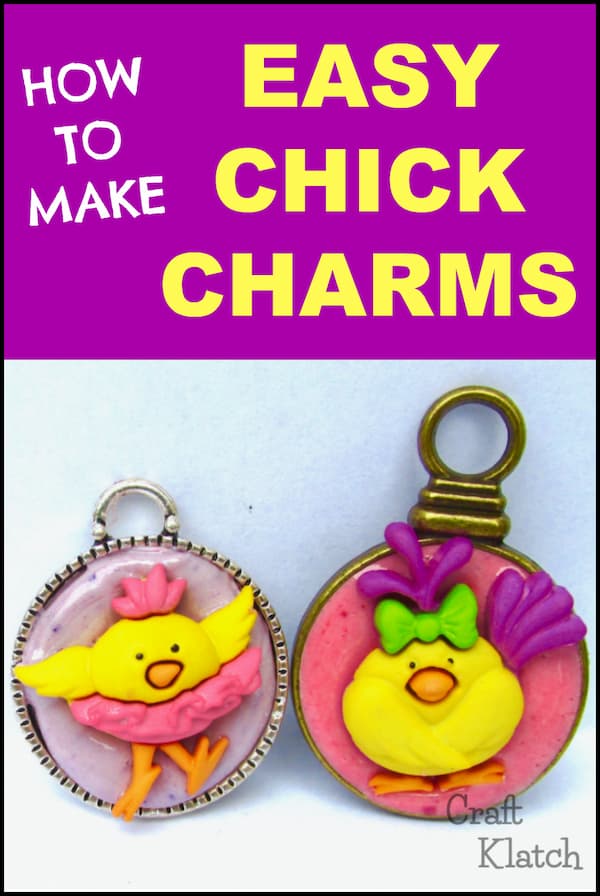
Learn how to make cute chick charms, using cute buttons and resin! It’s an easy Easter Craft!
Easter makes me think of pastels and cuteness in the form of bunnies and chicks!
I’m feeling the spring vibes!
When I found these buttons, I could not resist buying them! I thought they would make the perfect Easter project but I didn’t know what. I took me a while to figure out what to make.
If you can’t resist chicks for Easter, I also have Goofy Chick Resin Coasters and also Easy Chick Coasters that anyone can make!
If you are thinking bunnies, I have a fun Easter Bunny House that I made out of resin and an Easter Bunny Coaster that is sure to make you smile!
Cute Chick Charm Video Tutorial
Here is the full video tutorial, so you can see exactly how I made these cute Easter crafts. You’ll be surprised at how easy it is!
Supplies to Make The Easter Crafts:
*This blog uses affiliate links. As an Amazon Associate I earn from qualifying purchases, at no additional cost to you.
Cute Chick Charms Directions
Step 1: Get Ready to Make The Easter Crafts
I found these bezels a while back. They were actually in the clearance section and I thought they would be perfect for Easter crafts…in the form of the cute chick charms.
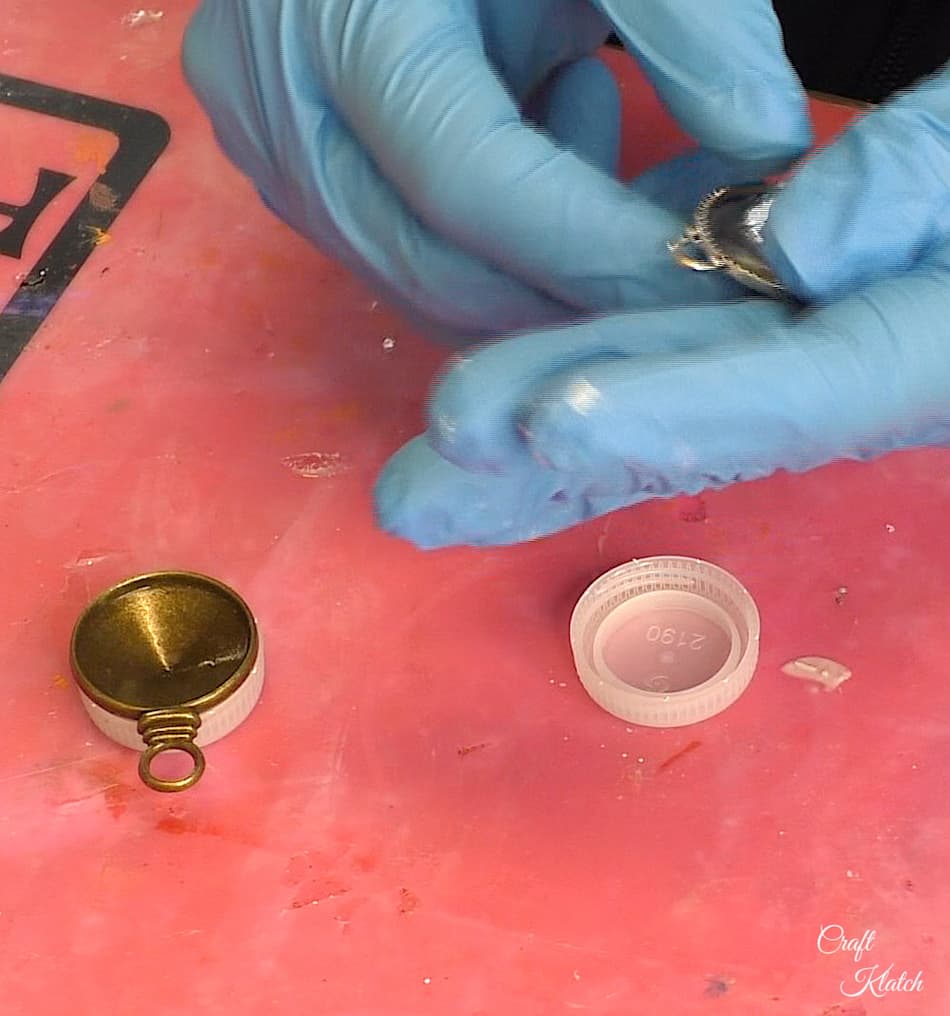
Because they do not have flat backs, I used bottle caps to keep them in place. The size was surprisingly perfect!
Step 2: Mixing the Resin
I mixed my resin. The resin I used is a fast curing resin and it cures white. Therefore, I had to work fast!
I separated the resin into two small cups and added pigment powder to each. Pigment powder can have a very strong color, but because the resin cures white, it definitely tones them down and makes them pastel.
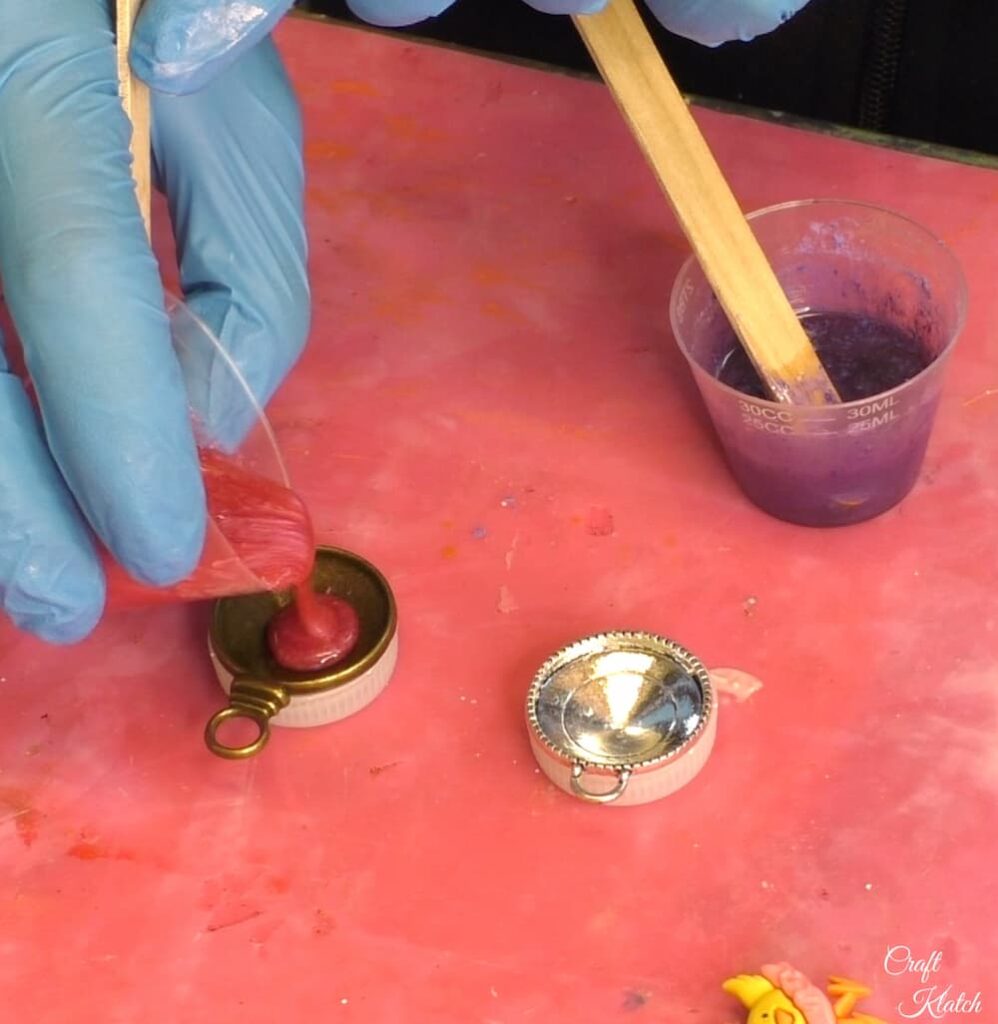
I poured the resin into the bezels.
When you pour the resin, I would suggest that you do it slowly, so it doesn’t overflow the small bezel. Of course, not too slow because it is a fast curing resin.
Be sure to follow me on INSTAGRAM!
Step 3: Drop the Cute Chick Buttons in the Bezels
I dropped the first cute chick button into the pink resin and let it sit. The timing on that one was perfect.
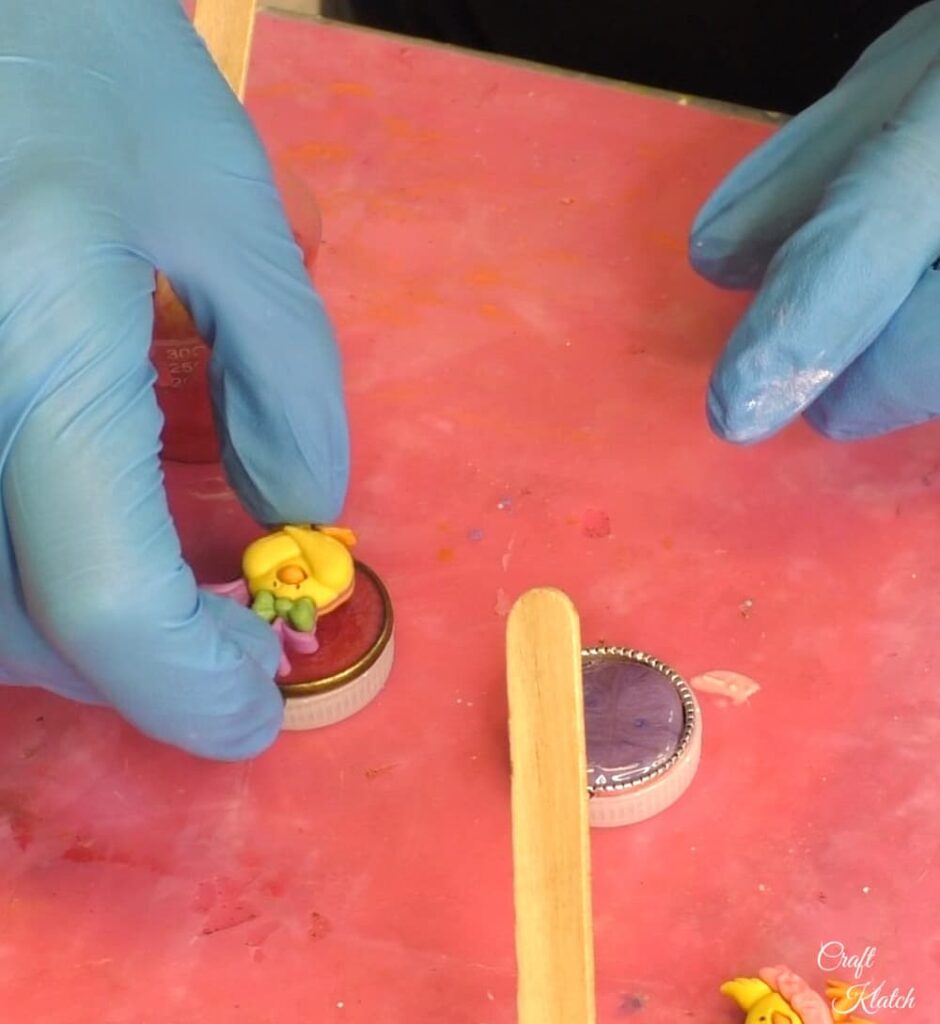
The purple resin was curing quickly, so I had to move fast and squish the other cute chick into it and hold onto it. It all cured within 15 minutes.
Phew! I got that one in just in the nick of time!
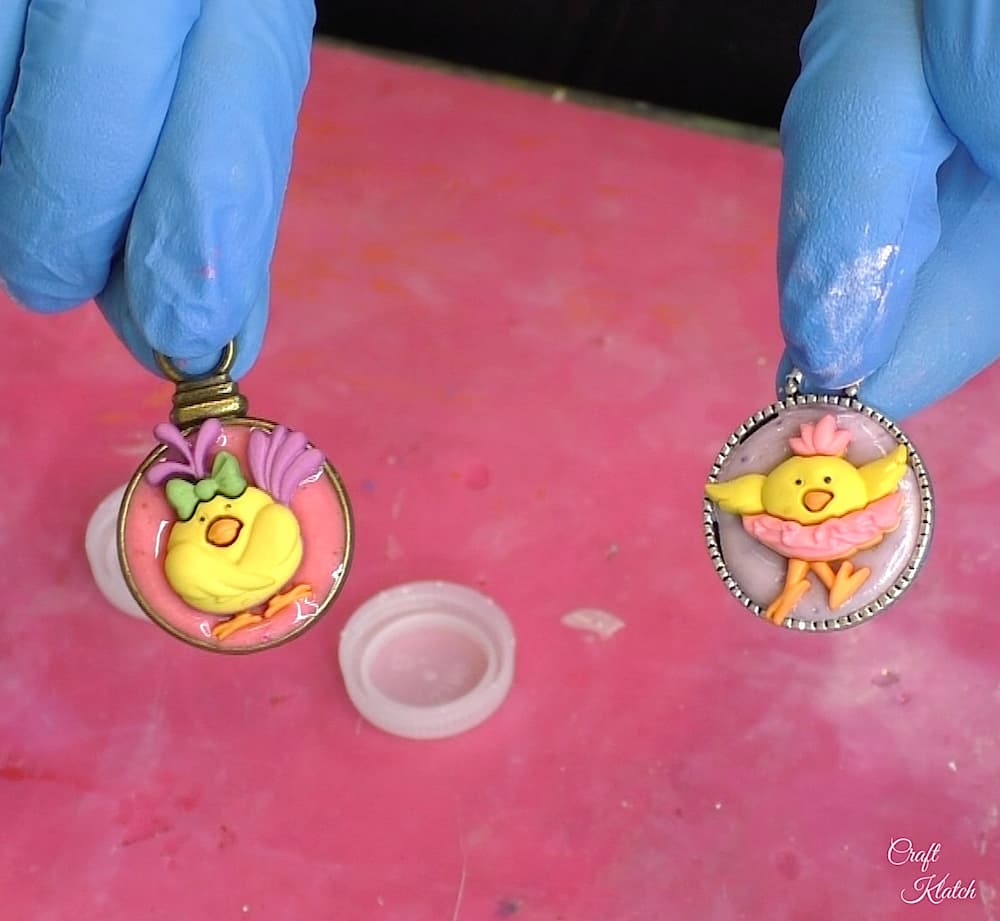
Once cured, they were stuck in nice and tight. There is no of them popping out.
Thank goodness because you don’t want to give Easter crafts as gifts and next thing you know, a cute chick pops out!
That’s it! Now we have two super cute chick charms! Add a jump ring and a cord and you have a necklace. You can also turn it into a keychain.
You know how the kids like having things hanging from their backpacks? I thinks these would be perfect for that too!
So start making some Easter crafts!
Easter Necklace Alternatives:
Holidays come upon us before we know it! If you don’t have time to make the Chick Charms, here are some really fun alternatives:

Thanks for stopping by! Remember: Life’s too short not to shimmer, so grab your glue gun and your glitter!™ Stay safe!
Mona
Remember to Pin It for later!