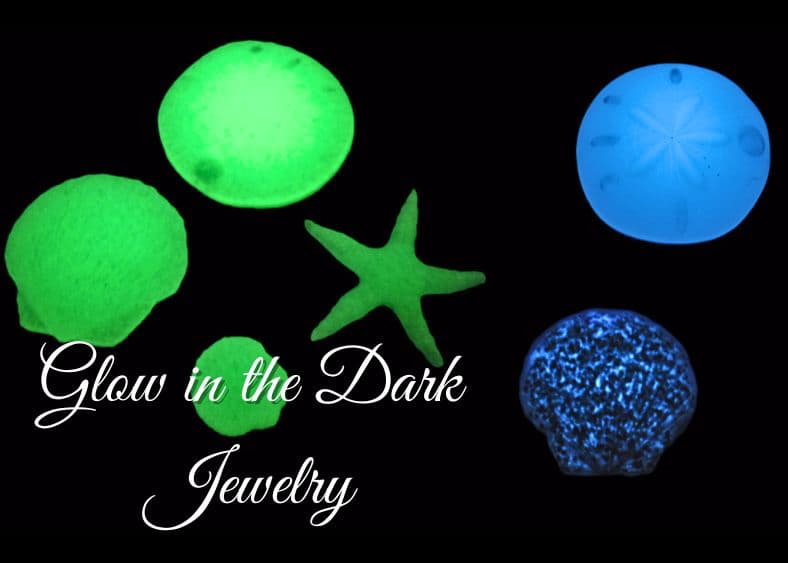
Create stunning glow in the dark DIY resin pendants with this easy craft tutorial! This craft is perfect for beginners with fun results.
If you love all things beachy like I do and enjoy working with resin, you’ll love this glow in the dark DIY! Combining resin with glow in the dark powder and glitter just takes your creations to the next level.
Whether you’re new to resin or an experienced crafter, this is the perfect way to experiment and create beautiful, wearable art.
I love all things beach-related! Add resin to the mix and I love it even more! Make it glow in the dark and I am over the moon!
Materials You Will Need for the Glow in the Dark Jewelry
*Disclosure: This blog uses affiliate links from Amazon and other retailers. I earn a small amount from qualifying purchases at no additional cost to you.
- Glow in the dark powders
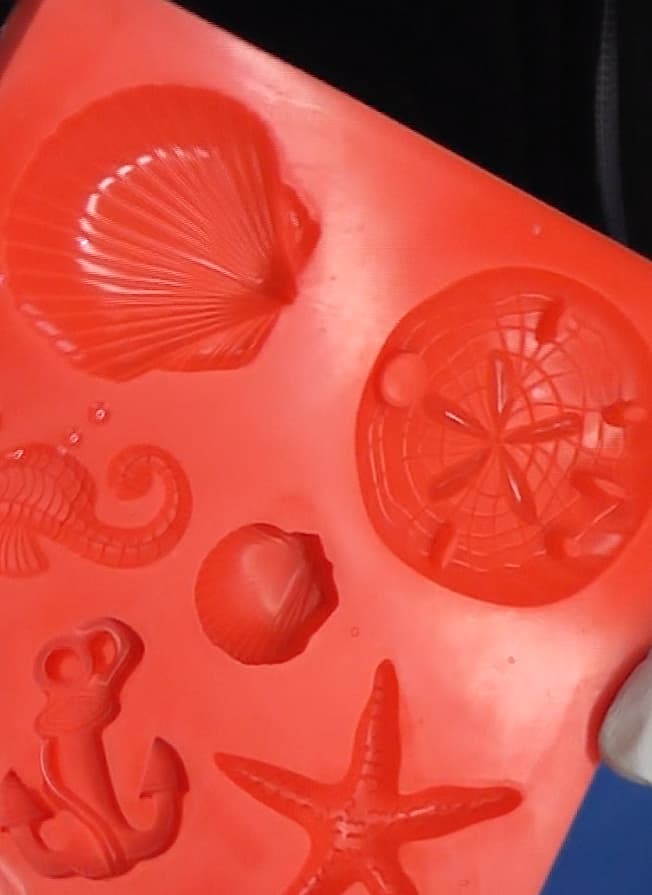
- Sea life mold
- More sea life molds
- Glow in the dark glitter
- Jewelry bails
- Glue
- Resin:
- When deciding on which resin to use, there are a lot of qualities that might be appealing, UV resistant, price, heat resistance, etc. Just make sure to select a resin that fits your needs.
- Use whatever brand you like:
- Easy Cast
- Art Resin
- Let’s Resin
- Promise Epoxy
- These are heat resistant resins:
- FX Poxy
- Stone Coat
Easy Beachy Glow in the Dark Jewelry Video
If you want to see me make it instead of reading about it, watch the video, and then you can use the written directions as an additional guide.
Glow in the Dark Jewelry Directions:
Step 1: Prepare the Resin
Mix resin according to the package directions. One ounce should be fine.
When I am working on other projects, if I have excess resin, I like to pour it into little molds like this one. You’d be surprised how often a little resin piece may come in handy, like in my Mermaid Light.
Step 2: Get Ready to Glow in the Dark
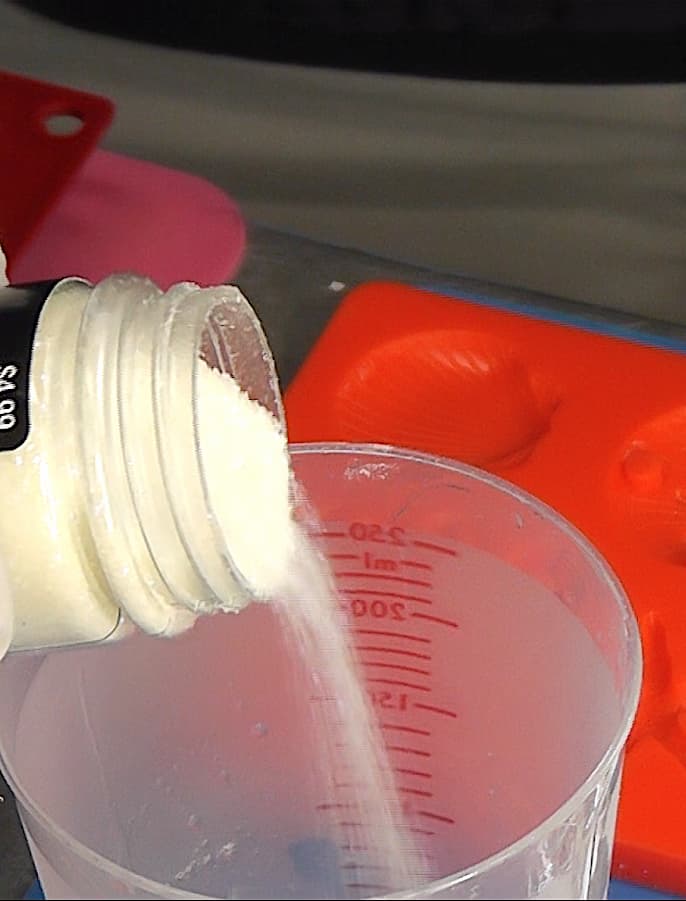
Mix in either the glow in the dark glitter or the glow in the dark powder. The powder will glow longer than the glitter but it is also pricier.
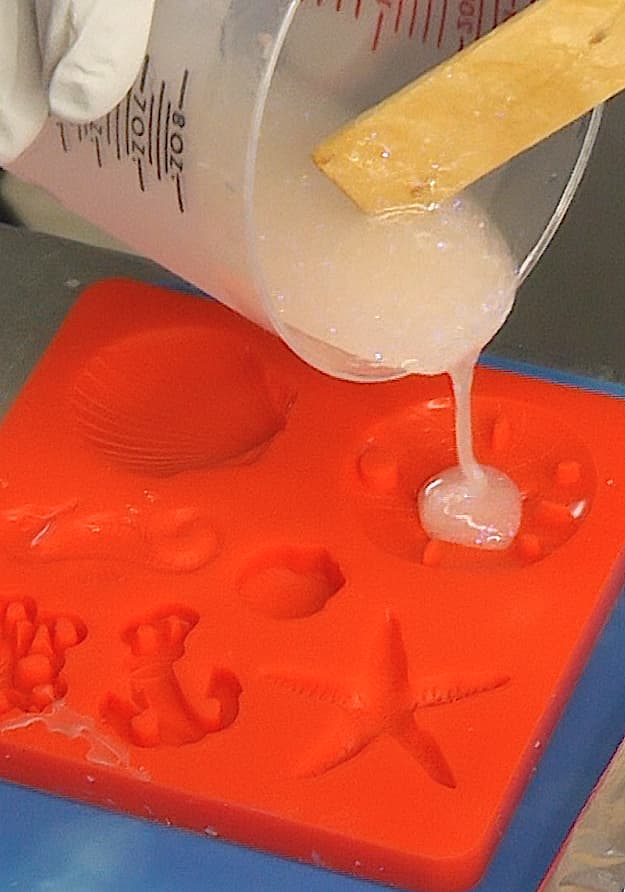
Step 3: Pour and Cure
Pour the resin mixture into your mold. Use a lighter to pop any bubbles – just move it quickly over the resin and mold.
Let the resin cure for at least 12 hours before removing the pieces from the mold.
Step 4: Time to Create Glow in the Dark Pendants and More!
Now that you have molded these pieces, they can be used for a lot of things, the toughest thing for you to do is decide what you would like to make.
- Create keychains
- Glue to picture frames or mirrors
- Attach them to a bookmark
- Glue them to rings or bracelets
As you can see, these pieces and be used for many things. However, for this particular craft, I thought pendants would be fun.
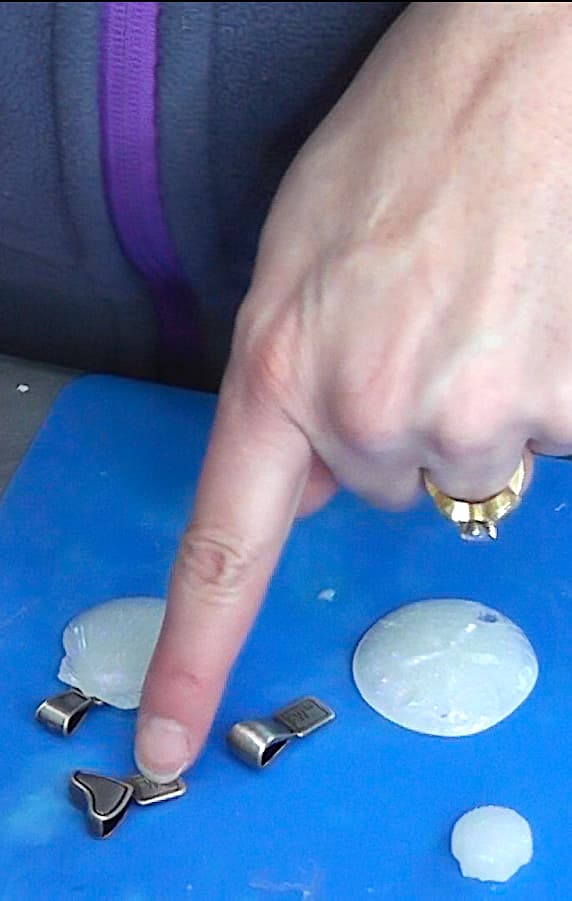
Step 5: Attach the Jewelry Bail
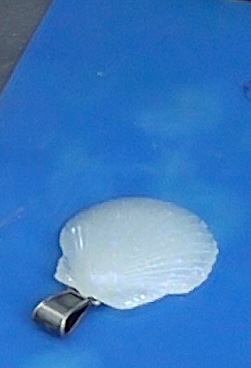
Glue a jewelry bail to the back of each resin piece and let it dry completely. Add a chain or cord to complete your easy, fun, and totally unique glow in the dark necklace!
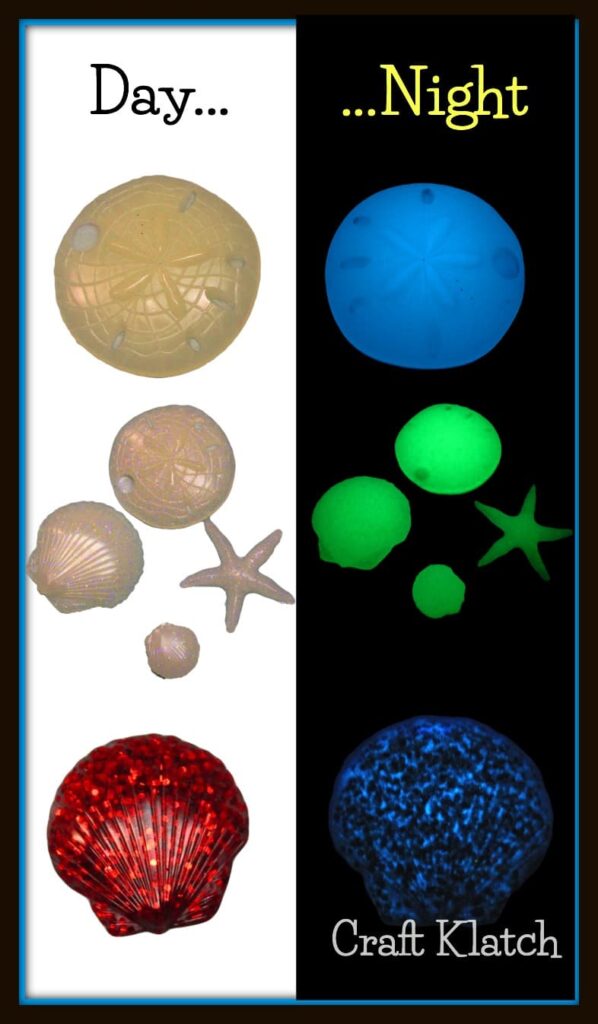
You Can Customize!
These glow in the dark resin pendants are not only fun to make but can be used in so many ways. They make excellent gifts or unique accessories, so show off your crafting skills!
You can customize these charms and pendants by using different colors – glow in the dark powders and glitters come in many different ones!
You can also use different bails – also there are so many available!!!
Above all else always have fun!
Thanks for stopping by! Remember: Life’s too short not to shimmer, so grab your glue gun and your glitter!™ Stay safe!
Mona
Be sure to follow me on Instagram!
Here is a project where I incorporated resin pieces from this mold: