To stay up on the latest, be sure to
SUBSCRIBE to my YouTube Channel!
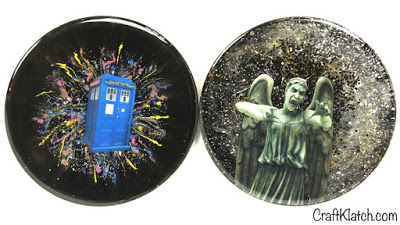
Okay, the Doctor Who coasters have finally been made!! I talked to viewers, my sister, my brother-in-law and Wikipedia! This was the best I could do!

You will need:
– Resin
– Glitter (chunky black and fine silver)
– Printer
– Toothpicks
Here is the video tutorial:
Directions:
1. Mix resin, according to the package directions. You only need three or four ounces for the first pour (to make two coasters).
2. Split into two cups and add chunky black glitter to one and mix. Add some black india ink to the second and mix well.
3. Pour both into the molds. Pop bubbles as needed.
4. Using a toothpick and pigment powders, add streaks or swirls to each of the wet resin pieces. Let it set for a minimum of 12 hours.
5. While it is setting, you can print out your images.
6. Cut them to fit into the coaster mold.
7. Paint the backside of the weeping angel with silver acrylic paint. This may take two coats. Paint the back of the tardis with white acrylic paint. Allow to dry.
8. Once the first layer of resin has set, mix two more ounces and pour one ounce into each coaster.
9. Pop bubbles with lighter.
10. Slide the images into the resin and press down with your stir stick, to make sure you get all the bubbles out from under the transparency film.
11. Pop bubbles as needed and allow to cure.
That’s it! Thanks for stopping by! Happy Crafting and stay safe!
Mona

Hi Mona! I love all of your coasters! I am obsessed with resin because of you. I found some art I love on a drink box, what would be the best way to incorporate that into a coaster?
Hi Amy~ I'm so glad you have found a love for resin! Tell me a little more, or send me a picture of the drink box, so I have a better idea of what you mean. Send it to craftklatch[at]gmail.com Mona
I really like this and I would love to make some but would it be possible without the transparency film?