SUBSCRIBE to my YouTube Channel!
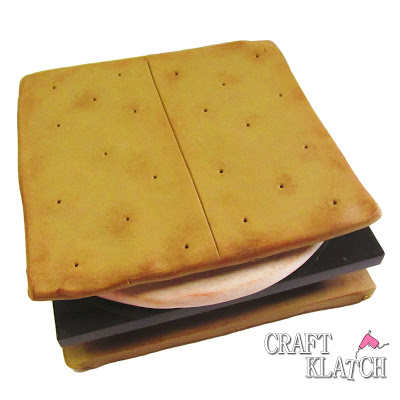
Add a little whimsy to your home decor by having Smores Drink Coasters! It’s a perfect way to add a little summer fun. Using polymer clay and resin, I crafted these fun drink coasters to protect your furniture. The polymer clay pieces can be used for hot drinks as well.

You will need:
Square silicone mold: https://amzn.to/29zlTQT
White polymer clay: https://amzn.to/29LJi40
Latte polymer clay: https://amzn.to/29EPzur
Fast Cast Resin: https://amzn.to/29GgWGO
Or Easy Cast Resin: https://amzn.to/29B0yFV
Brown pigment: https://amzn.to/29Ghe0i
Black pigment: https://amzn.to/2acGr21
Pastel chalk: https://amzn.to/29EPhUo
Pasta machine (optional): https://amzn.to/29KqJ0Q
Needle tool: https://amzn.to/29GhuML
Blade: https://amzn.to/29B0VAa
Here is the video tutorial:
Directions:
For this coaster I used a different resin then I normally do. Typically, I use Easy Cast and it is a clear resin. The folks at Envirotex Lite sent me some Fast Cast to use. It’s their new resin product. It sets is 15 minutes, which is great! It also sets white, which is good for some applications. I thought I would try it out on this coaster to see how it went. You can use the Easy Cast instead, or whatever resin you are comfortable with. Either works fine.
1. Mix one ounce of your resin, according to the package directions. The Fast Cast dries white, so if you are adding color to it, you need to keep that in mind. Whereas a clear resin will come out the color you see when you mix it, the Fast Cast will create a much lighter color when cured.
2. Once mixed, add colorant. I tried just adding brown to the resin, but it came out like chocolate milk. On the second try, I first added some black to initially darken it and then I added a lot of brown. It worked like a charm and it cured in 15 minutes!
3. Now onto the marshmallow. In the end, I ended up making two marshmallows, rather than just one. Each marshmallow will take a package of clay. Condition the clay, by kneading it and squeezing it in your hand. Roll it into a ball and begin flattening it. You want it to have somewhat of a marshmallow look, but you also want it flat, so you can use it as a coaster.
4. Take your latte colored clay and condition it. You can use a rolling pin to flatten it, I happened to use the pasta machine. Once flat, lay your square chocolate resin on it and trim the clay to fit. You need to do that twice, since you need a top graham cracker and a bottom graham cracker.
5. With a needle tool, or a pen, or any tool you have on hand that will work, draw an indent down the middle of the graham cracker. On each side of the line, put 11 dots. Look at a graham cracker for reference.
6. Using pastel chalk that has been ground into powder, take a paint brush and brush the edges of the graham crackers, the dots and middle line of the graham crackers and the edges of the marshmallow. This is to give the marshmallow a toasted look and the graham cracker a baked look.
7. Bake the clay pieces according to the package directions.
Once cool, you can assemble your smores!!
That’s it! Thanks for stopping by! Remember: Life’s too short not to shimmer, so grab your glue gun and your glitter!®
Stay safe!
Mona
