
Make your own Easter Bunny decor with this easy DIY toilet paper roll craft! A fun, budget-friendly project perfect for spring and Easter decorating.
If you’re looking to add a handmade touch to your spring celebrations, then this adorable Easter Bunny decor is a must-try!
Using just a simple toilet paper roll and a few basic craft supplies, you can create the cutest little bunny to brighten up your home. It’s perfect for Easter tablescapes, Easter baskets, or just adding a cheerful touch to a shelf or windowsill.
And the best part? You probably already have everything you need!
I’ve been hoarding toilet paper rolls again, much to Greg’s chagrin! They usually start piling up around Christmas, but Christmas came early this year in the form of Easter!
And it even doubles as napkin rings!
5 DIY Easter Decorations From Simple Materials | Easter Crafts Video
You can see how I made the Easter Bunny decor craft in this video, along with carrots, chicks, grass nests, and tulips!
Materials You Will Need
*Disclosure: This blog uses affiliate links from Amazon and other retailers. I earn a small amount from qualifying purchases at no additional cost to you.
- Toilet paper roll
- White acrylic paint
- Bright pink acrylic paint
- Black permanent marker
- Green acrylic paint
- Small white pom-pom (for the tail)
- Paintbrushes
- Multi Surface Paint
Directions on How to Make Your Easter Bunny
Step 1: Sketch and Cut Your Bunny Shape
Start by sketching two bunny ears and a rounded top for the head onto one side of the toilet paper roll. Lightly draw a curved line halfway down the roll to define the face area.

Once you’re happy with the shape, carefully cut it out with scissors. Don’t worry if it’s not perfect—your bunny will still be adorable!
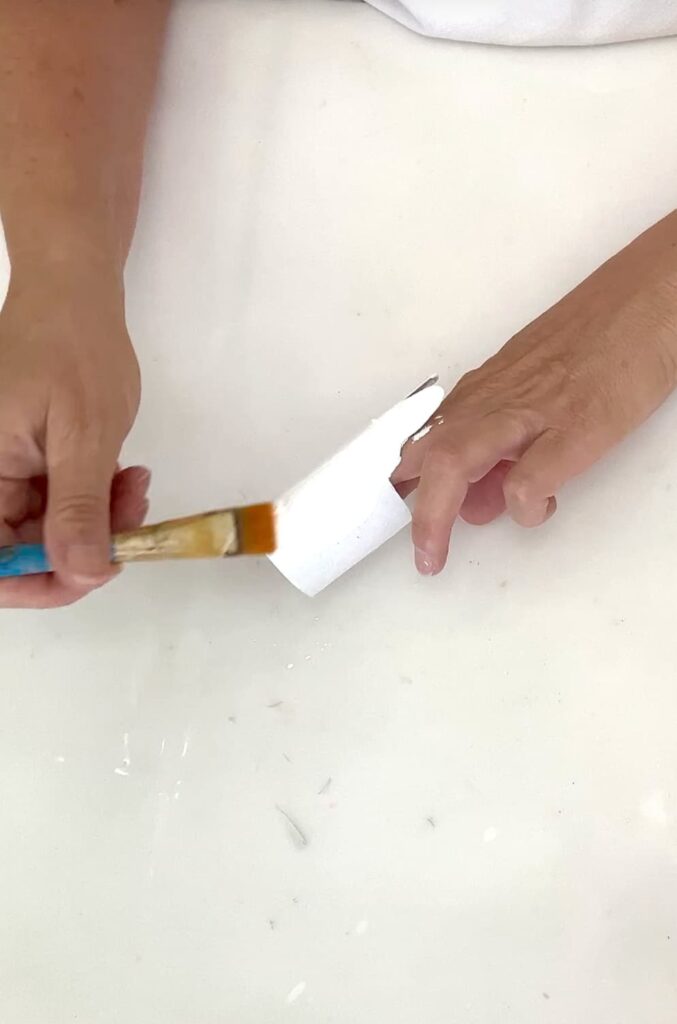
Step 2: Paint It White
Use white acrylic paint to coat the entire bunny, inside and out. You may need two coats for full coverage. Let it dry in between layers.
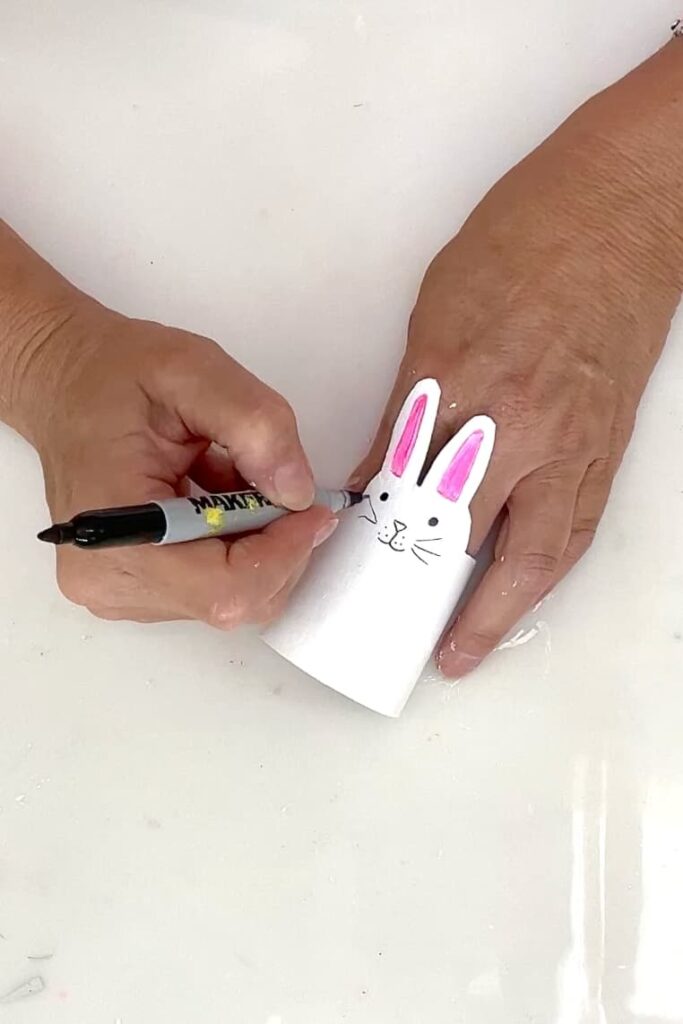
Step 3: Add the Pink Details
Use bright pink paint to color in the inner ears and give your bunny a cute little pink nose.

Step 4: Draw on the Face
With a black permanent marker, draw on the bunny’s eyes, smile, cheeks, and some whiskers. Using a fine-tipped black marker or pen, you can also outline the ears and face for extra definition.
Step 5: A Bowtie and a Tail
Add a pop of color by painting a little green bow tie below the face. You can leave it as-is or outline it for extra flair.
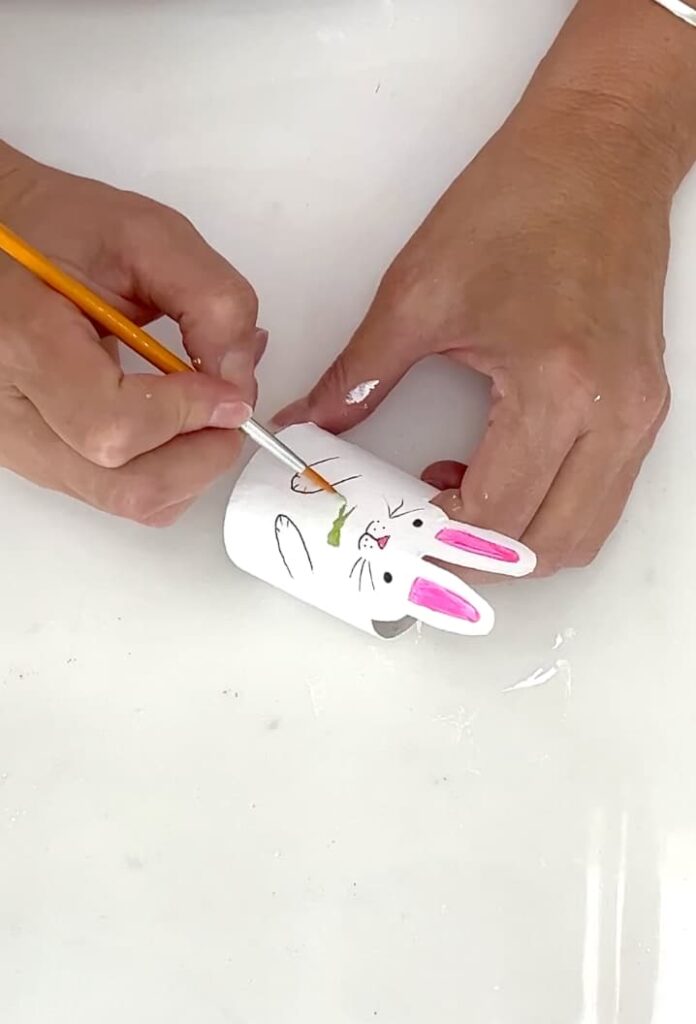
Flip the bunny around and hot glue a small white pom-pom to the back. This fluffy little tail completes your cute Easter bunny!
Display Your Easter Bunny Decor
Your bunny is ready to hop into your spring decorating! This Easter Bunny decor is perfect to complement your table setting as a napkin ring or part of the centerpiece.
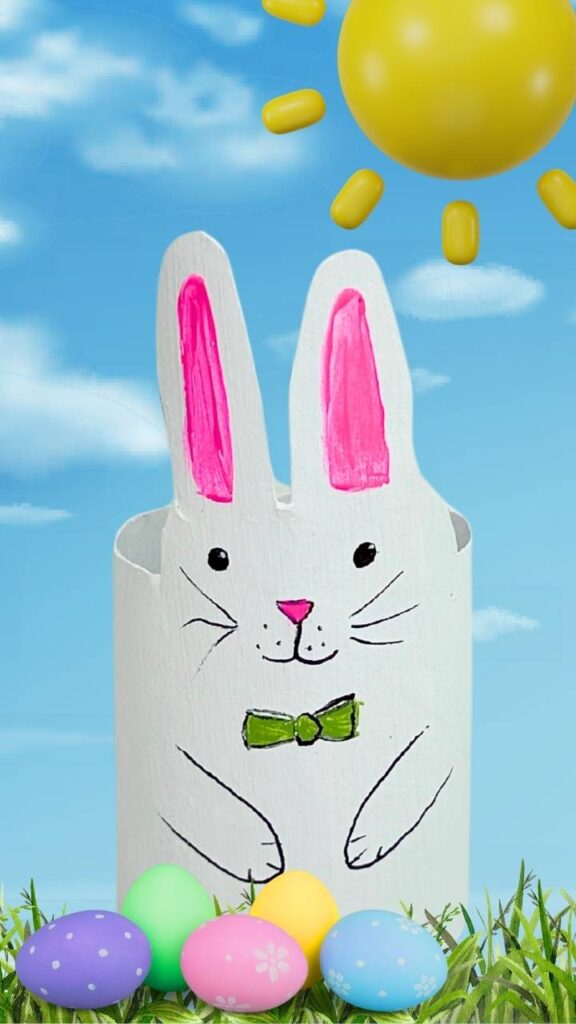
It also works great in Easter baskets or on a bookshelf or mantel.
If you get the kids involved, think of all the different expressions and fun colored bowties you’ll have!
More Toilet Paper Roll Crafts!
Don’t miss these easy toilet paper roll crafts! These are Christmas crafts and let’s be honest, it’s never too early to start planning for Christmas!
- Toilet Paper Roll Christmas Tree Ornament
- Christmas Star Craft
- Bird Christmas Tree Ornament
- Christmas Ornament Recycling Craft
Remember: Life’s too short not to shimmer, so grab your glue gun and your glitter! Stay safe!
Be sure to follow me on Instagram!
Mona