Add shimmer to your decor! Learn how to make a dazzling glitter acrylic paint pour vase using fun fluid art techniques in this step-by-step guide!
I’ve got another 50-cent thrift store vase, and some pouring paints calling my name!
We’re about to have some fun with acrylic pouring and fluid art by creating a sparkly glitter vase! With metallic and glitter paint and we’re going to top it off with resin. We’ll turn a thrift store find into something totally eye-catching.
Stick with me, and I’ll walk you through each step to make your own masterpiece!
Materials Needed for the Acrylic Paint Pour

*Disclosure: This blog uses affiliate links from Amazon and other retailers. I earn a small amount from qualifying purchases at no additional cost to you.
- Vase (cleaned with rubbing alcohol)
- White acrylic paint for priming
- Pouring paints (Denim Flash, Onyx Flash, Opal Crush, Rose Gold glitter)
- Circle cups
- Silicone cups
- Canvas (painted white)
- Nitrile gloves (for handling resin)
- Resin:
- When deciding on which resin to use, there are a lot of qualities that might be appealing, UV resistant, price, heat resistance, etc. Just make sure to select a resin that fits your needs.
- Use whatever brand you like:
- Easy Cast
- Art Resin
- Let’s Resin
- Promise Epoxy
- These are heat resistant resins:
- FX Poxy
- Stone Coat
How to Create an Acrylic Paint Pour Masterpiece Video
You can click on the video HERE
Directions
Step 1: Prepare the Vase for the Acrylic Paint Pour
Before we start pouring, the vase needs to be prepped. I cleaned mine with rubbing alcohol to remove any residue. Then, I gave my canvas a coat of white acrylic paint to provide a solid base for the acrylic pour.
Then, I set up my vase on silicone cups and put it on the canvas so it would pick up
Step 2: Layering the Colors
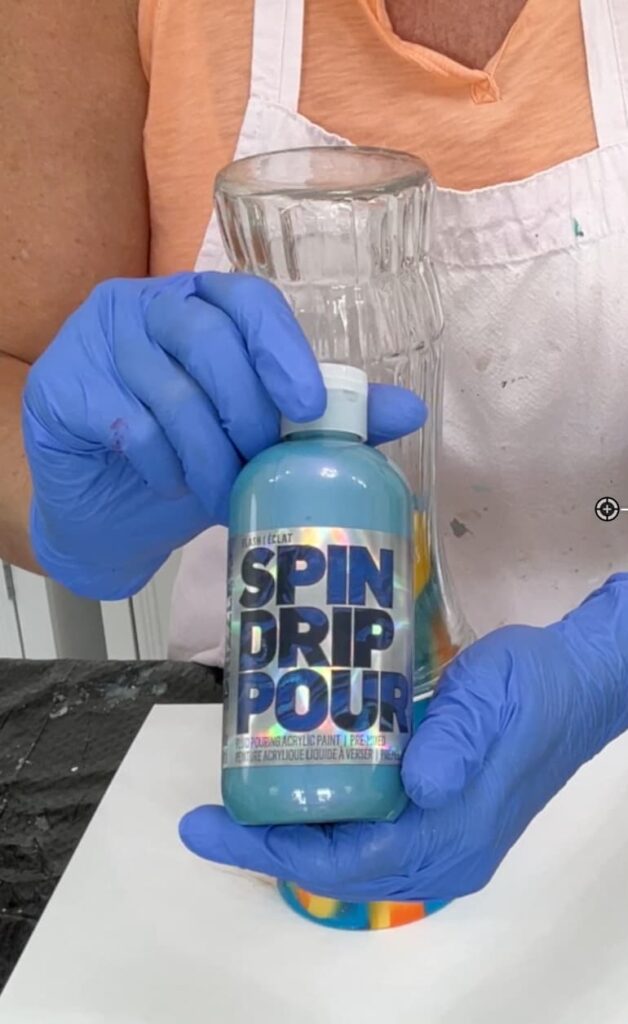
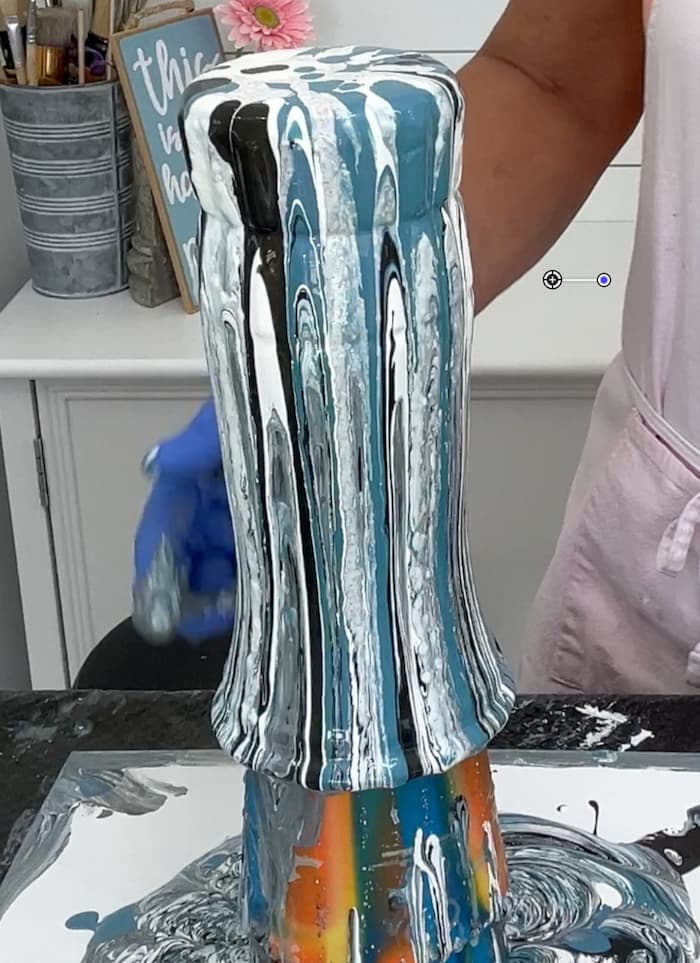
To begin the fluid art process, I poured some white pourable paint onto the vase. This helps the other colors stand out and flow smoothly.
Next, I layered Denim Flash (a blue shade with a purple shimmer) and Onyx Flash (a darker metallic). I alternated these with white and threw in the Rose Gold glitter paint for added sparkle. The key to a successful acrylic pour is to keep alternating colors to create dynamic patterns.
Step 3: The Acrylic Paint Pour
For that extra sparkle, I mixed in the Opal Crush glitter paint. This particular glitter paint was pretty thick and I didn’t know how it would dry but it ended up drying smooth.
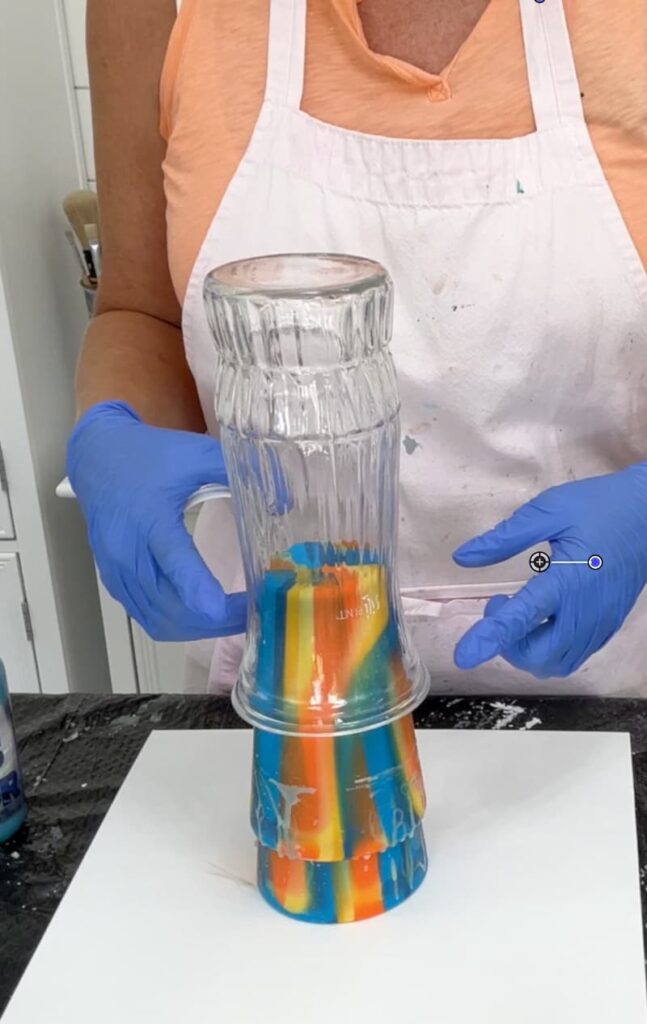
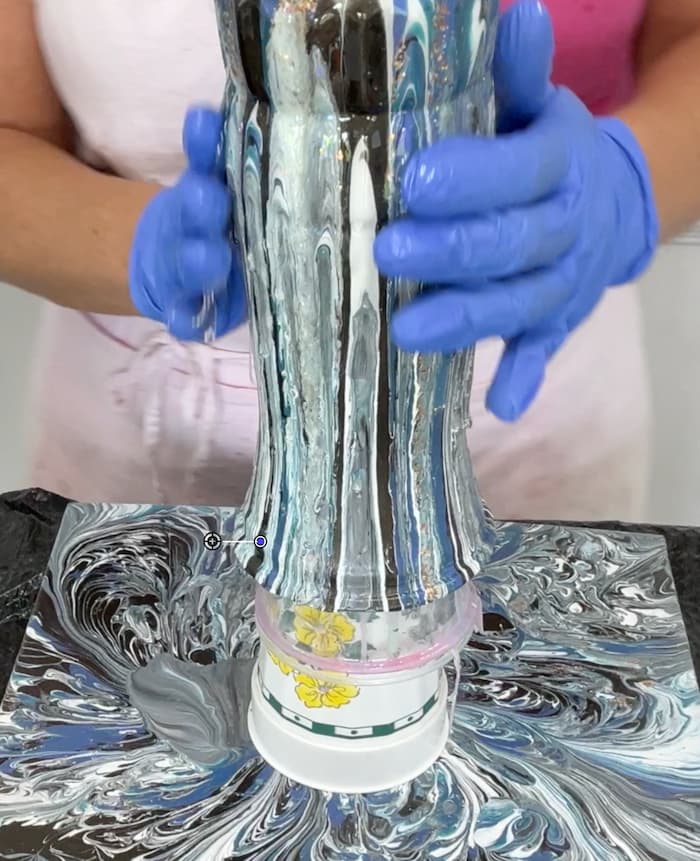
I poured them into a circle cup I had on top of the vase, and when I lifted the cup, the colors just por

Once my layers were ready, they started pouring the paint down the vase. The paint naturally flowed, creating beautiful swirling patterns. The textured vase made it a little harder. The paint didn’t want to flow into the fluted areas. I helped it along by adding more paint in those spots.
Step 4: Working with the Canvas
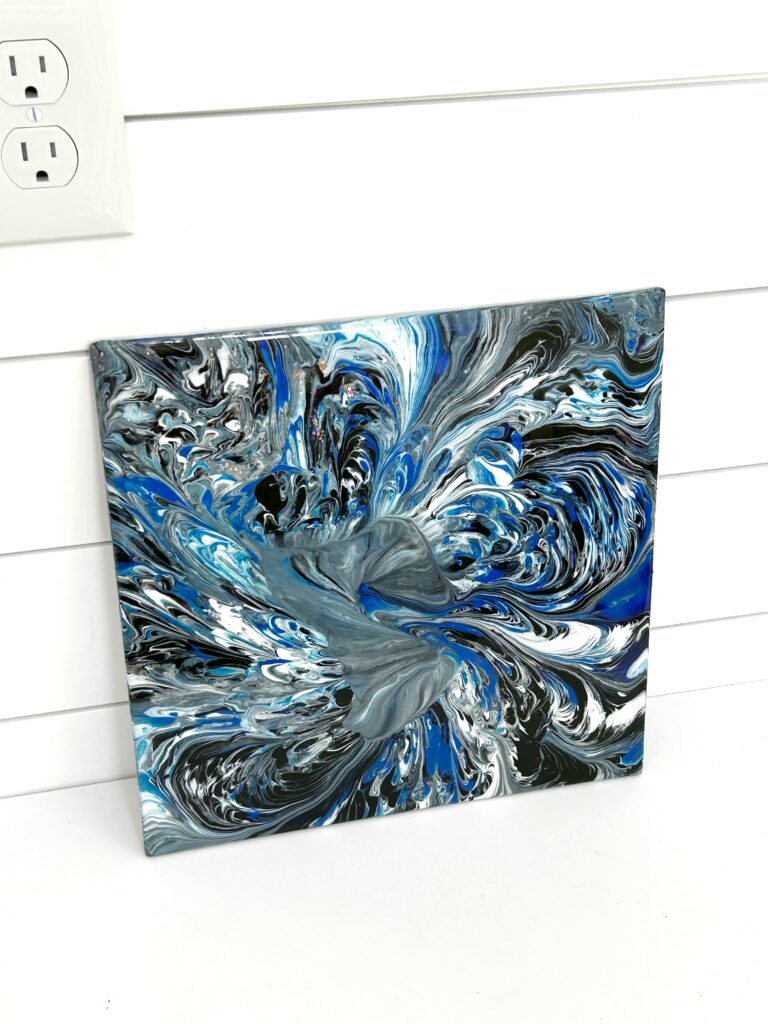
I was working over a canvas because I didn’t want any paint to go to waste! I let the excess paint drip onto the canvas. Once the vase was ready to be moved off the canvas, I put it to the side to continue dripping. I tilted the canvas around until the entire surface was covered. This turned into a bonus acrylic pour art piece!

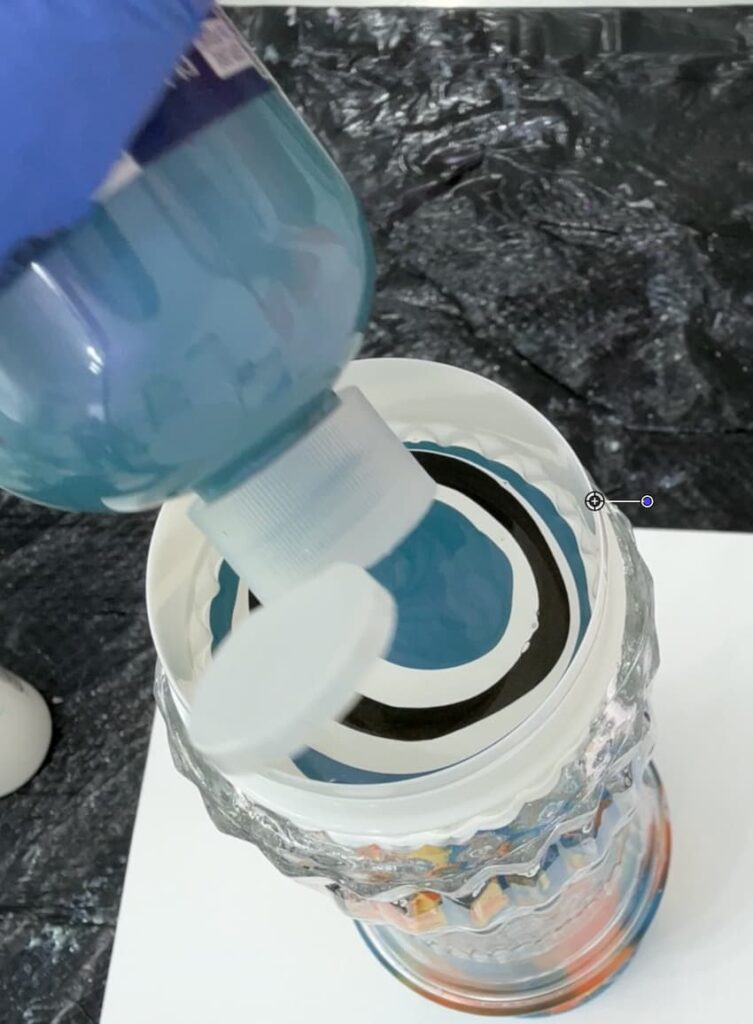
Step 5: Sealing the Acrylic Paint Pour with Resin
Once the vase and canvas dried, it was time to add resin to seal in the glitter and paint. I mixed 4 ounces of resin and carefully poured a thin layer over the vase. Using gloved hands, I spread it evenly to ensure that every spot was covered.
I repeated the same process for the canvas, moving the resin around until it covered the entire surface. The resin not only seals the artwork but also enhances the colors, making them pop beautifully.
Now comes the hardest part—waiting!
They were left to cure a minimum of 12 hours before handled them. Make sure they are placed on a level surface and allow them to dry completely.
The Big Reveal
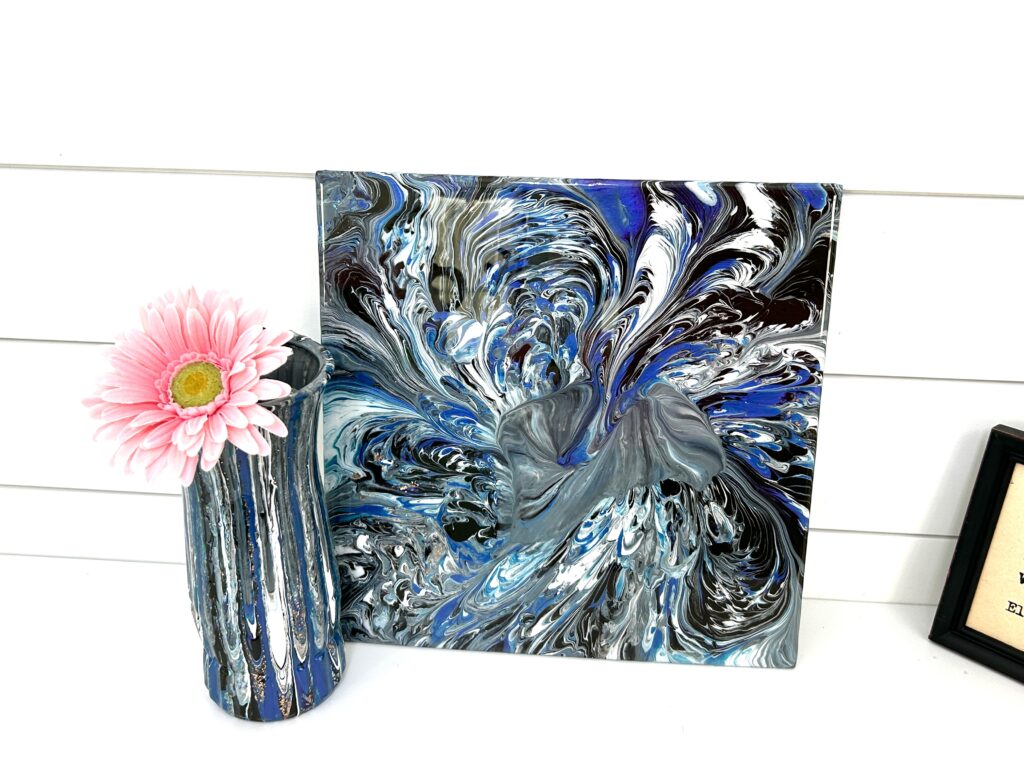
Once everything was cured, the glitter and colors shone through, creating a stunning final piece. The vase looked elegant with its glittery swirls, and the canvas resembled a stormy sky with hints of shimmer.

This acrylic pour vase turned out beautifully, with the fluid art technique adding a unique touch to both the vase and the canvas.
What do you think?
Do you love the drips and swirls, or would you prefer a cleaner look? Let me know in the comments below, and don’t forget to grab your free resin guide HERE! Life’s too short not to shimmer, so grab your glue gun and glitter!™
Other Acrylic Paint Pour and Resin Pour Projects You Will Love
- 5 Steps to Create a Pretty Vase with Acrylic Paint Pour DIY
- Acrylic Paint Pouring on Vases DIY: Transform your glassware in 5 easy steps
- The Best Mushroom Decor DIY: Crafting an Easy Mushroom Light in 3 Easy Steps
- DIY Old Fashioned Rock Candy Salt Resin Vase: A Stunning Dollar Tree Project
Mona