The best way to stay on top of my latest crafts is to
subscribe to my
subscribe to my
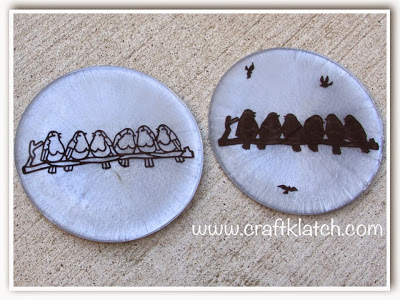
I love these outline stickers! I wanted to try it in a coaster this week and wanted to do the same sticker in two different ways. I did an outline and a silhouette. I think they turned out pretty cute!

You will need:
– Coaster mold
– Pigment powder (pearl white, gray & blue)
– Resin (Easy Cast or Envirotex Lite work great)
– Outline stickers (I used Starform stickers)
– Black permanent marker
– Super gloss Mod Podge
Here are some of the items I used from available from Amazon, incase you want to give it a shot:
Here is the video tutorial:
Directions:
1. Prepare your resin, according to the package directions.
2. Mix in white pigment powder. Once well mixed, add a small amount of gray and a small amount of blue. Mix a little at a time because you can always add more, but you can’t remove it if you add too much color.
3. Pour resin into mold. Allow to set for at least 12 hours.
4. Take your permanent marker and color the sticker, while it is still on the sheet. Let it dry.
5. Carefully remove the sticker from the sheet and apply it to your coaster.
6. Carefully rub it down, but try not to leave any fingerprints.
7. If you are doing the outline, leave it as it is. If you are doing the silhouette, take your permanent marker and color in the stickers. I used some other smaller bird stickers and added them to look like they were flying around, getting ready to land, on the silhouette coaster.
8. Once the marker is dry, take Mod Podge super gloss and paint it over the whole coaster, not just where the stickers are. Make sure it dried COMPLETELY!
9. Once everything is totally dry, prepare more resin.
10. Pour a layer of resin over the whole coaster and let it set a minimum of 12 hours before unmolding.
That’s it! Thanks for stopping by and Happy Crafting!
Mona

I love those coasters, great job! Thank you for sharing with the Clever Chicks Blog Hop! I hope you’ll join us again next week!
Cheers,
Kathy Shea Mormino
The Chicken Chick
The-Chicken-Chick.com