Learn how to make a Waffle Resin Coaster DIY! It’s a great fun with food breakfast craft tutorial and fun home decor idea!
*This blog uses affiliate links. As an Amazon Associate I earn from qualifying purchases, at no additional cost to you.
Materials list:
Waffle mold: https://amzn.to/2LUoKdl
Amber pigment: https://amzn.to/2OxzOPS
Brown pigment: https://amzn.to/2SYsdZl
White pigment: https://amzn.to/2SXPpqq
Gold pigment powder: https://amzn.to/2OyHHVn
Copper pigment powder: https://amzn.to/2OyHHVn
Transparency film: https://amzn.to/313nl7Q
Mixing cups: https://amzn.to/2GG2K1K
Stir sticks: https://amzn.to/2T2UuOf
White acrylic paint: https://amzn.to/2LTTV8N
Parchment paper: https://amzn.to/2yy48Pm
Resin (use whatever resin brand you like):
Easy Cast: https://amzn.to/2yjYmBC
Art Resin: https://amzn.to/2yk9X3z
Clear Cast: https://amzn.to/2z4rxGw
This is the resin I used for this project:
FX Poxy: https://amzn.to/2AF3Pkk ~ According to the manufacturer, this one is heat resistant to 500 degrees F.
Directions:

2. I mixed three ounces of resin.

3. I added colors to make it look like a waffle color. I did that by mixing gold and copper pigment powder. I also added a white opaque pigment and made sure to mix it really well.


4. I poured it into the mold.

5. I popped the bubbles with my lighter and let it cure a minimum of 12 hours.

6. Once cured, I removed it from the mold.

You can see the areas where I dusted the copper onto the mold.

You could be finished right now. It would work as a coaster or even a fun soap dish! But I wanted to take it a step further!

7. I found a royalty free image of a melting pad of butter and printed it out on transparency film.

8. I cut it out and made sure I did not leave a border.

9. I painted the backside with white acrylic paint. Be sure to do two coats.

After the first coat, it is streaky.

After the second coat, it’s nice and solid.

10. I mixed approximately two ounces of resin.

11. I mixed a little amber pigment into the resin.

12. I added just a touch of brown in an attempt to give it the color of maple syrup.


13. Once mixed, I dipped the butter into the resin. I wanted to make sure it was all covered, so it was protected and would stick to the waffle. I am working on parchment paper because I can go more freeform and the cured resin will pull off of it.


14. I then poured the remaining resin over the butter and waffle.

15. I wanted it to look natural, so I let it run over the sides.


16. I used my lighter to pop the bubbles.

17. I peeled the resin off of the parchment paper.

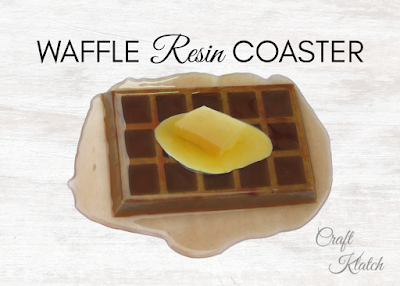
There it is! Now I have a fun waffle coaster!


Here is the back.

Perfect for your morning coffee, tea, or whatever you might drink for breakfast!


